CHAPTER 16 Intramucosal Insert Surgery and Prosthodontics
CAVEATS
The greater palatine and incisive neurovascular bundles must be avoided.
INTRAMUCOSAL INSERT-SUPPORTED COMPLETE MAXILLARY DENTURES
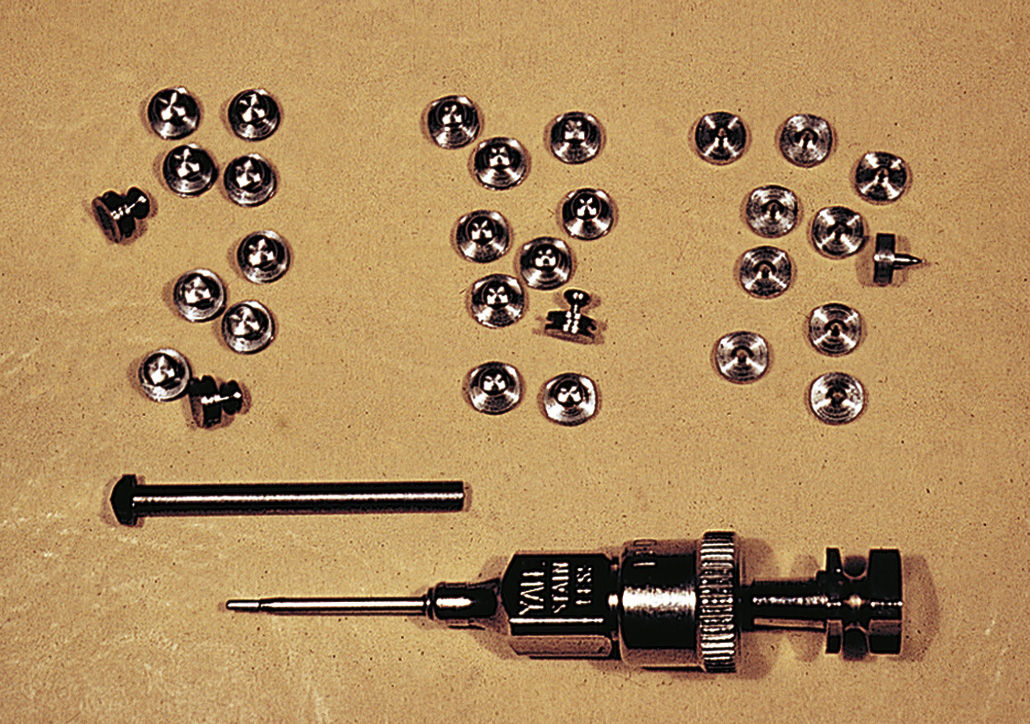
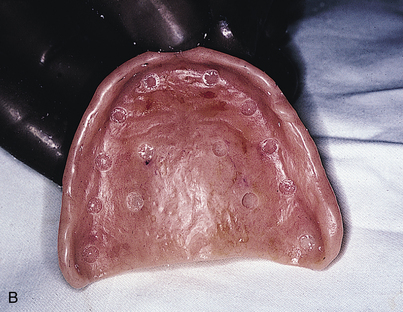
The tissues are dried, and then a Kerr Dycal applicator tipped with pressure indicator paste (Fig. 16-1) is used to mark the spots, which should be evenly placed at the crest. The first mark is made 5 mm lateral to the midline. The second mark is made in the center of the tuberosity, and the third is made halfway between them. The distance between these three marks is divided, and marks four and five are placed at the midway points. Repetition on the opposite side of the arch locates the first 10 marks. This is more than sufficient for the Park-type heads. For the earlier designs, the eleventh mark is placed 1 cm palatally from the ridge crest and midway between marks three and four. The twelfth mark is placed midway between marks four and five in line with the eleventh mark. These steps are repeated on the opposite side to locate the thirteenth and fourteenth marks. The surgeon should check the radiographs for low-dipping antra and should avoid the regions of major foramina and nerve bundles.
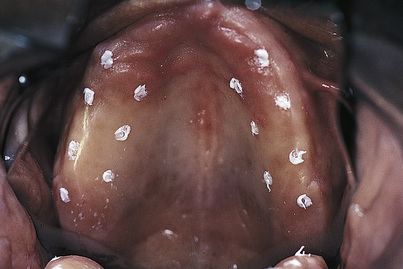
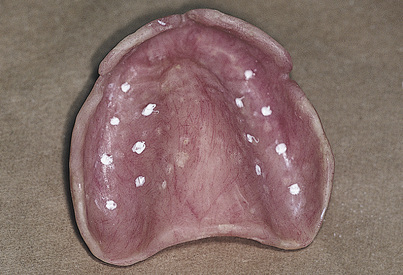
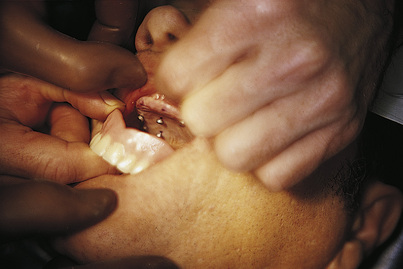
The denture is dried and seated directly upward, and the patient is guided into firm centric closure. When the denture is removed, the white marks will have transferred to it from the opposing tissues (Fig. 16-2). At the site of each white spot on the denture, the base-preparing bur is used to make an opening at an absolute right angle to the acrylic at each of the marks (Fig. 16-3). The bur is sunk precisely to the depth of the cutting blade to create holes into which the intramucosal insert bases will find flawless housing, exactly level with the acrylic.
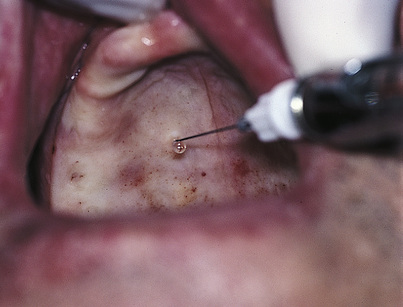
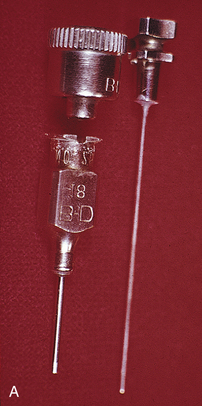
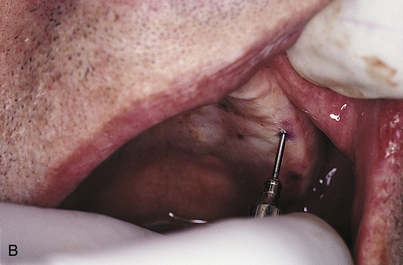
A 30-gauge, short anesthetic needle is used to infiltrate a single drop of lidocaine 2% and 50,000 epinephrine into each of the 8 to 14 white marks in the tissues, assuming that these drugs are not contraindicated for the patient (Fig. 16-4).
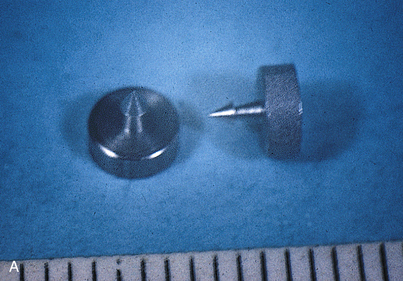
A single arrowhead surgical indicator stylus is placed in each of the holes in the denture (Fig. 16-5), and each is tipped with a moistened, purple, indelible pencil. If the chosen system does not supply indicator styli, a somewhat less exacting technique can be used. The intramucosal inserts are processed into place with self-curing acrylic and tipped with indelible pencil to transfer their locations to surgical sites in the mucosa. Again, the denture is seated aggressively in a directly vertical maneuver so that each of the arrowheads or indelible pencil marks transfers to the tissues exactly opposite the site of its denture hole. The denture is removed with care after a gauze throat curtain has been placed to catch any loosened styli.
About half of the styli will remain lodged in the tissues, and the other half will come away with the denture (Fig. 16-6). The latter group leaves the tissues tattooed with punctate purple spots.
After the styli are removed, one by one, a round hole is cut into the tissues with the trephine, which should be forced through the tissues in a perpendicular direction. Its handle is pushed directly to bone and then rotated clockwise and counterclockwise several times (Fig. 16-7). Care must be taken not to press too hard in the premolar and molar areas, or the maxillary sinus may be penetrated. If this should happen, the site should be abandoned until it heals by secondary intention. (See Chapter 28 if healing by secondary intention fails to occur.) The trephine is removed, and its lumen is unplugged with the stylet; this should produce a small core of tissue. However, this core can be obtained only when the cutting end of the trephine is rotated against bone firmly enough to excise the tissue thoroughly. Each receptor site is created in the same fashion. Some brisk bleeding may occur, but tamponade solves this problem. Dramatic hemostasis also can be achieved by plugging a Racellet cotton pellet into the site.
Eight to 14 holes have been created, each the diameter of an insert cervix. At this point, none is wide enough to accommodate the insert head. To allow entry of these larger components, a Bard-Parker (BP) No. 11 blade in a long handle is used to make a cruciform or X incision is made at each site. Two 3-mm incisions at right angles to each other with the trephined hole at the center complete this operation (Fig. 16-8).

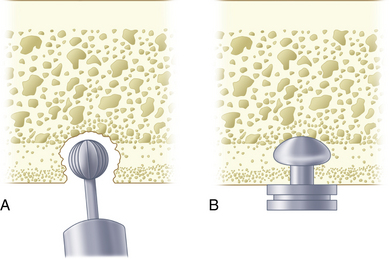
The depth of each hole is measured with a periodontal probe or with an actual insert that has been soldered to a broken instrument handle so that the measurements can be recorded on an anatomic chart. If any of the sites is less than the full depth of the insert head and cervix (usually 2.2 mm, but as much as 2.5 mm, depending on the system), the bone that lies at the base of the surgical site must be deepened. A sterilized No. 6 round bur in a high-speed handpiece should penetrate the bone to the bur head’s full depth, which creates enough vertical depth to accommodate the head and cervix of the insert (Fig. 16-9). The patency of each X incision is checked one last time, and the patient is instructed to bite on a roll of saline-moistened surgical sponges.
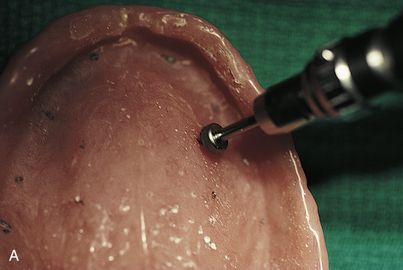
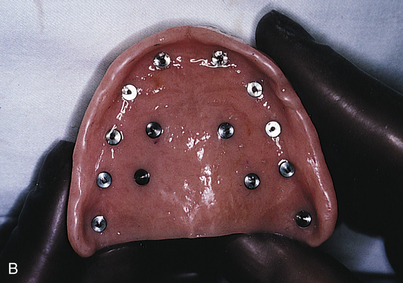
The denture is washed and dried thoroughly, and a sable paintbrush is used to place a drop of monomer in the first receptor site (Fig. 16-10, A). This is followed with application of a thin slurry of acrylic powder and liquid into the retentive groove of the intramucosal insert base. The inserts are held at their necks with the beaks of locking college pliers forceps, and each is vibrated into its receptacle in the denture (Fig. 16-10, B and C). Care must be taken to ensure that its platform is perfectly level with the surrounding acrylic. Minimal amounts of acrylic should be used, to allow total seating of the insert base.
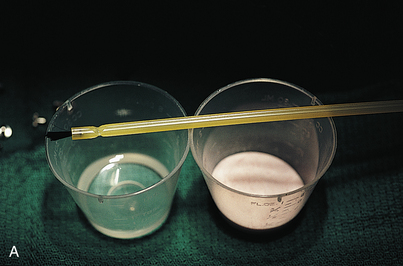
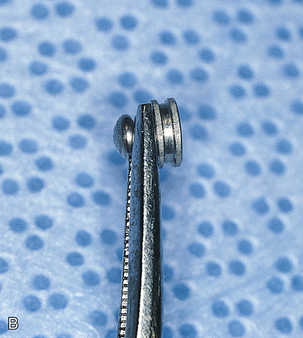
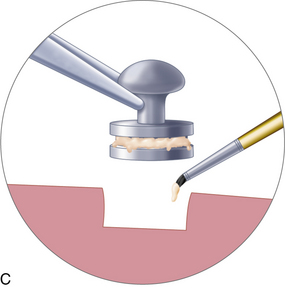
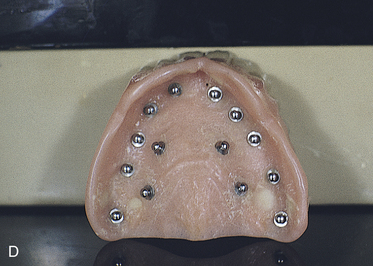
FIGURE 16-10. A, Pink autopolymerizing polymethyl methacrylate, applied with a paintbrush, is required to seal each two-tiered or textured (see Fig. 16-14) insert base into the denture. B and C, The inserts are held with the tips of pliers, and small amounts of acrylic are used to lute each into its assigned aperture. D, When placement of the intramucosal inserts is complete, the denture is seated and centric occlusion is confirmed.
The sponges are removed from the patient’s mouth, and the denture is seated. The inserts should move completely into place (Fig. 16-10, D). This can be verified if centric occlusion is correct and the postdam area is well seated. If this is not the case, each surgical site must be reassessed with a depth gauge as instructed previously, and those that need it must be deepened.
Stay updated, free dental videos. Join our Telegram channel
VIDEdental - Online dental courses


