The Dental Examination
Learning Objectives
1 Pronounce, define, and spell the Key Terms.
2 Describe what is included in a dental examination.
3 Describe Black’s classification of cavities.
4 Identify charting symbols as related to dental needs and treatment.
5 Identify abbreviations used to name tooth surfaces.
6 Record a patient’s existing condition.
7 Describe the importance of a patient having a treatment plan.
Key Terms
Cavity Classifications
Diagnosis
Treatment Plan
A thorough dental examination is necessary for the dentist to make a diagnosis (identification of disease) and to recommend and proceed with a treatment plan for the patient. A dental exam consists of many parts, with the dentist evaluating the soft tissue, the periodontal tissue, and the teeth. Your role in this data gathering process is very important. The assistant will prepare the setup, assist in the collection of information, and record the information in the patient’s record as dictated by the operator.
Components of the Dental Examination
The dental examination begins after the patient has completed the medical and dental history form, and vital signs have been obtained and recorded by the dental assistant. The complete dental team (dentist, dental hygienist, and dental assistant) is responsible for gathering specific components of this information (Box 12-1).
The Assistant’s Role in Collecting Information in a Dental Examination
Your role in assembling what is necessary for the dentist to diagnose a patient’s dental status consists of (1) gathering all completed forms for the patient record; (2) completing any diagnostic procedures such as intraoral and extraoral radiographs, study casts, and photographs; and (3) charting or recording the dentist’s findings during the examination.
Examination Techniques
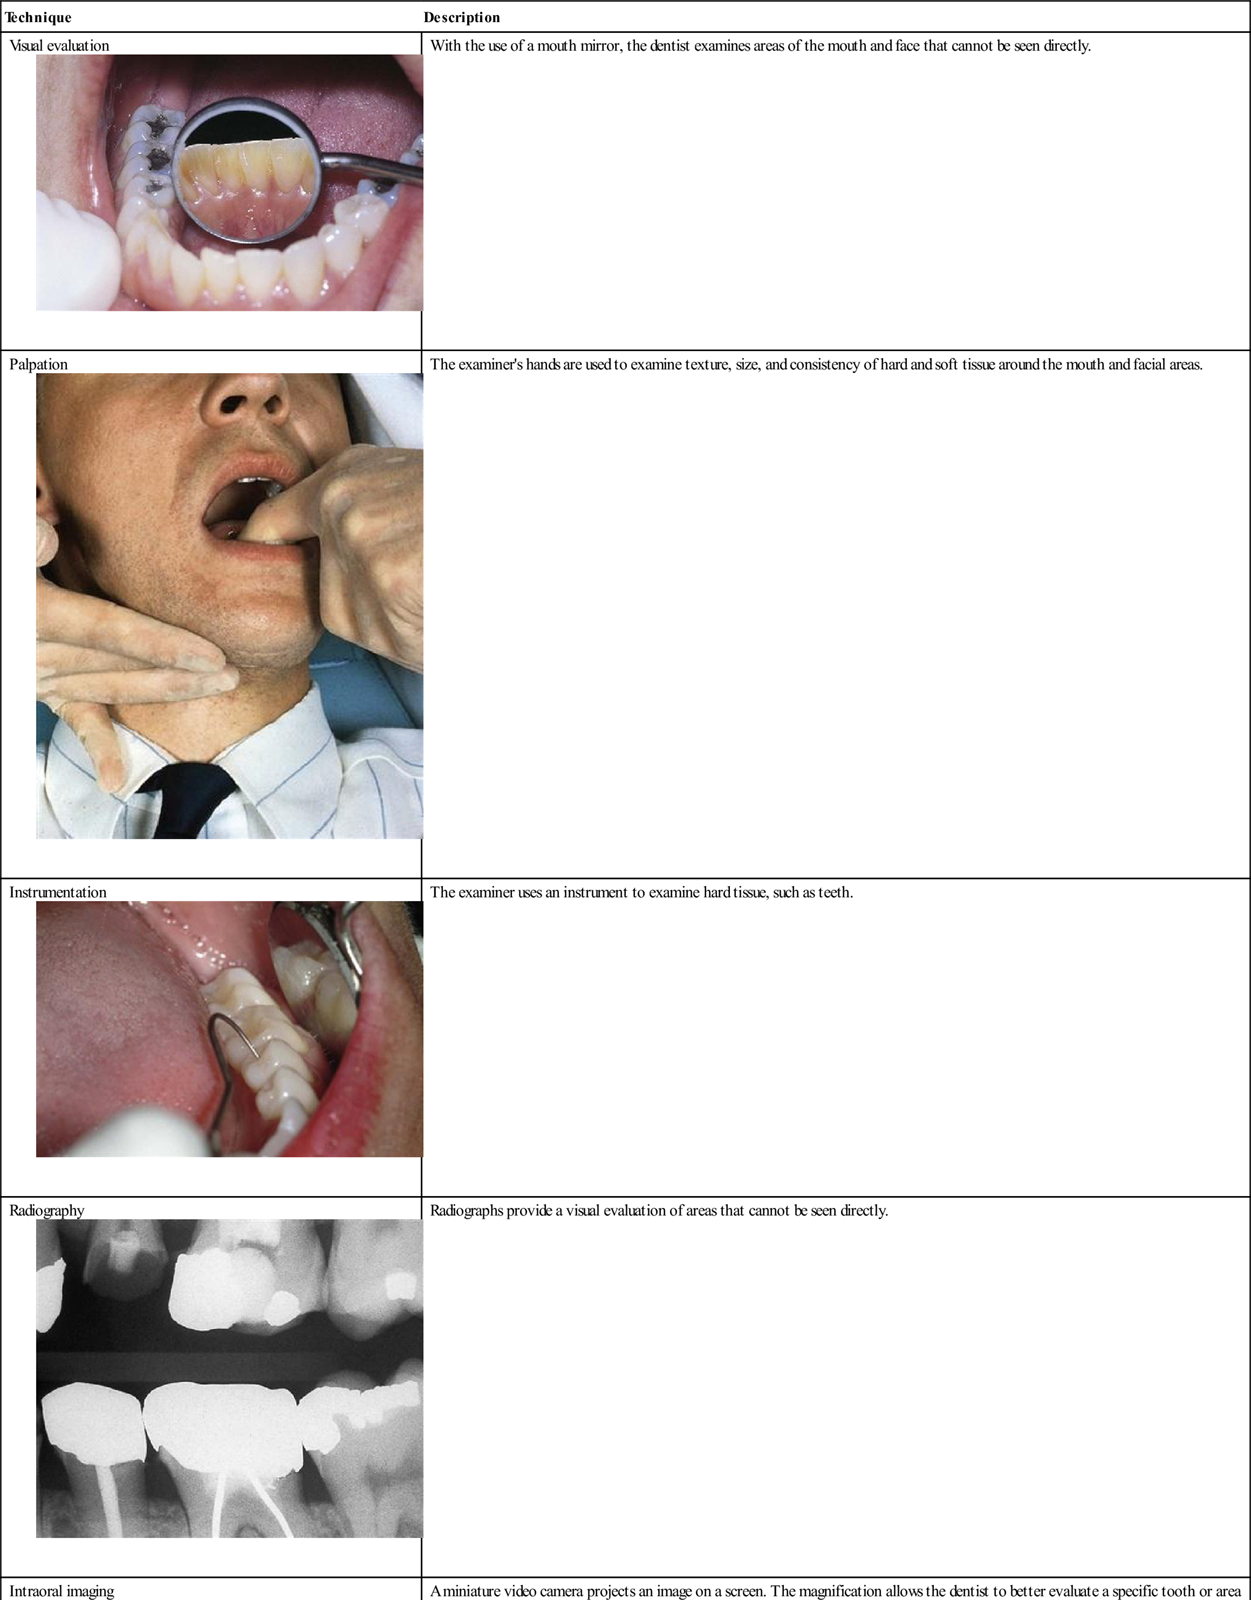
The dentist will use a variety of techniques to accomplish a thorough examination. A review of examination techniques is provided in Table 12-1.
TABLE 12-1
< ?comst?>
| Technique | Description |
Visual evaluation
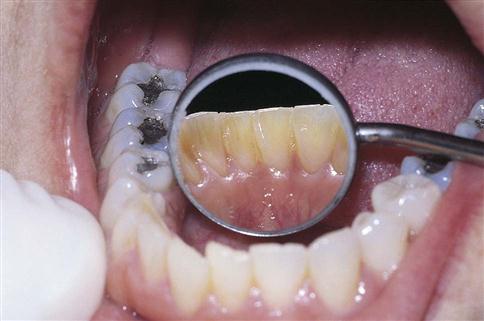 |
With the use of a mouth mirror, the dentist examines areas of the mouth and face that cannot be seen directly. |
Palpation
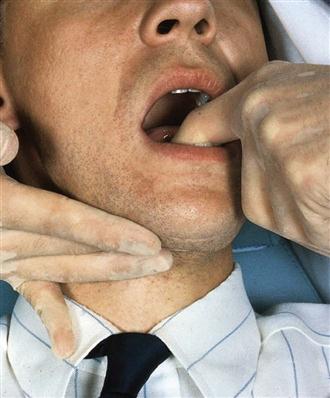 |
The examiner’s hands are used to examine texture, size, and consistency of hard and soft tissue around the mouth and facial areas. |
Instrumentation
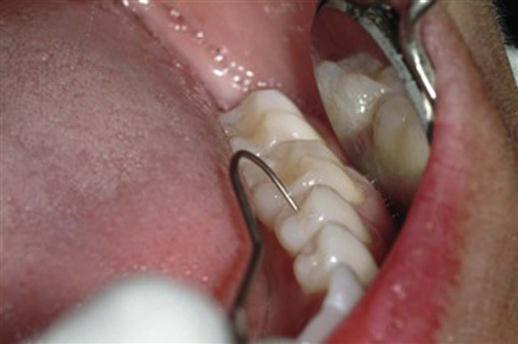 |
The examiner uses an instrument to examine hard tissue, such as teeth. |
Radiography
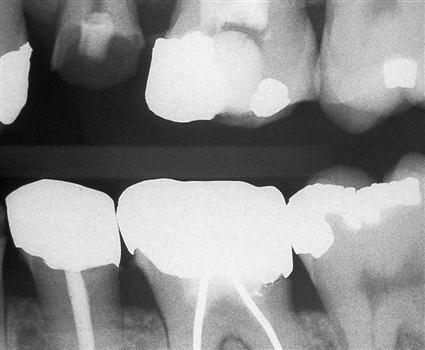 |
Radiographs provide a visual evaluation of areas that cannot be seen directly. |
Intraoral imaging
 |
A miniature video camera projects an image on a screen. The magnification allows the dentist to better evaluate a specific tooth or area of the mouth, which makes it easier for the patient to understand what the dentist is discussing. |
Photography
 |
Photographs are an excellent tool for identification, treatment planning, case presentations, and patient education. |
< ?comen?>< ?comst1?>
< ?comst1?>
< ?comen1?>
Recording the Dental Examination
Dental recording, also referred to as charting, can be described as “shorthand” for the dentist. The dentist will recite their findings, and the assistant will record these findings on the patient’s clinical examination form. Symbols, abbreviations, and color-coding are all used to indicate various conditions. To accurately and quickly chart the information dictated by the dentist, you must learn the dentist’s preferred system (Box 12-2).
The Oral Examination
A thorough oral examination includes more than just checking the teeth. It includes a careful examination of the neck, face, and lips, and all soft tissue within the mouth.
Soft Tissue Examination
The soft tissue examination involves a complete examination of the cheeks, mucosa, lips, palate, tonsil area, tongue, and floor of the mouth. This examination requires the use of visual examination and palpation. The purpose of this part of the examination is to detect any abnormalities in the head and neck area of a patient.
Examination of the Teeth
A clinical examination of the teeth includes a thorough examination of each tooth. With the use of hand instruments, the dentist examines each surface of each tooth. The dentist dictates the findings to the dental assistant, who records them on the clinical examination form of the patient’s record. Regardless of whether findings are recorded manually or by computer, it is essential that all entries are entered correctly and accurately.
Tooth Diagrams, Numbering Systems, and Color Coding
Tooth diagrams for recording dental conditions are available with a variety of diagram styles; however, the most commonly used diagrams are anatomic and geographic designs.
In an anatomic diagram, the illustration resembles actual teeth. In some styles, the roots of the teeth are also included (Figure 12-1).
In a geometric diagram, a circle represents each tooth. That circle is divided to represent each tooth surface (Figure 12-2).
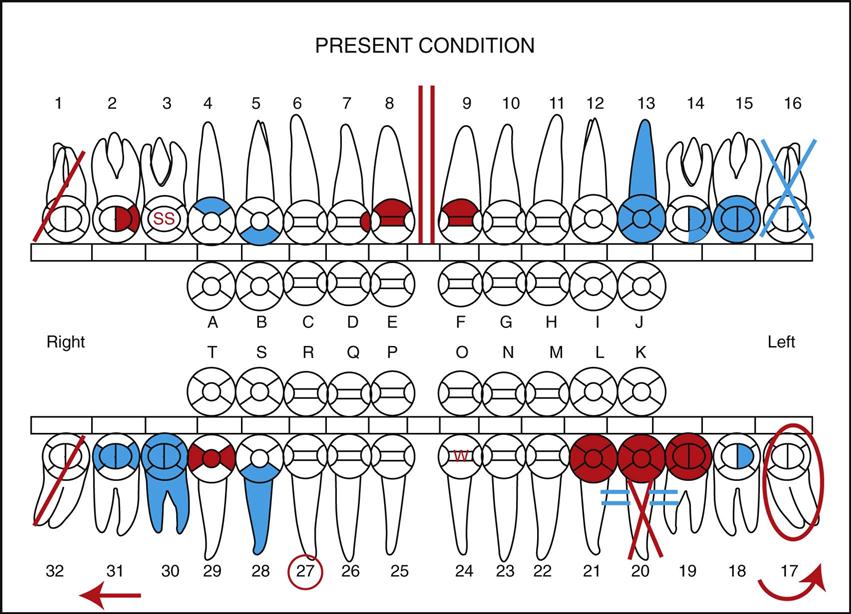
Tooth Numbering
To ensure greater accuracy, the teeth on the diagram are numbered in the appropriate sequence. The dentist selects the numbering system. (Numbering systems are discussed in Chapter 4.)
Tooth Arrangement
On charting diagrams, the teeth are arranged as if one is looking into the patient’s mouth. Thus the right quadrants are on the left side of the page and the left quadrants are on the right side of the page.
Color Coding
Different colors are used to chart on the diagram to provide visual information about each entry. Blue or black represents dental treatment that has been completed. Red indicates dental needs detected and is to be completed at future dental appointments.
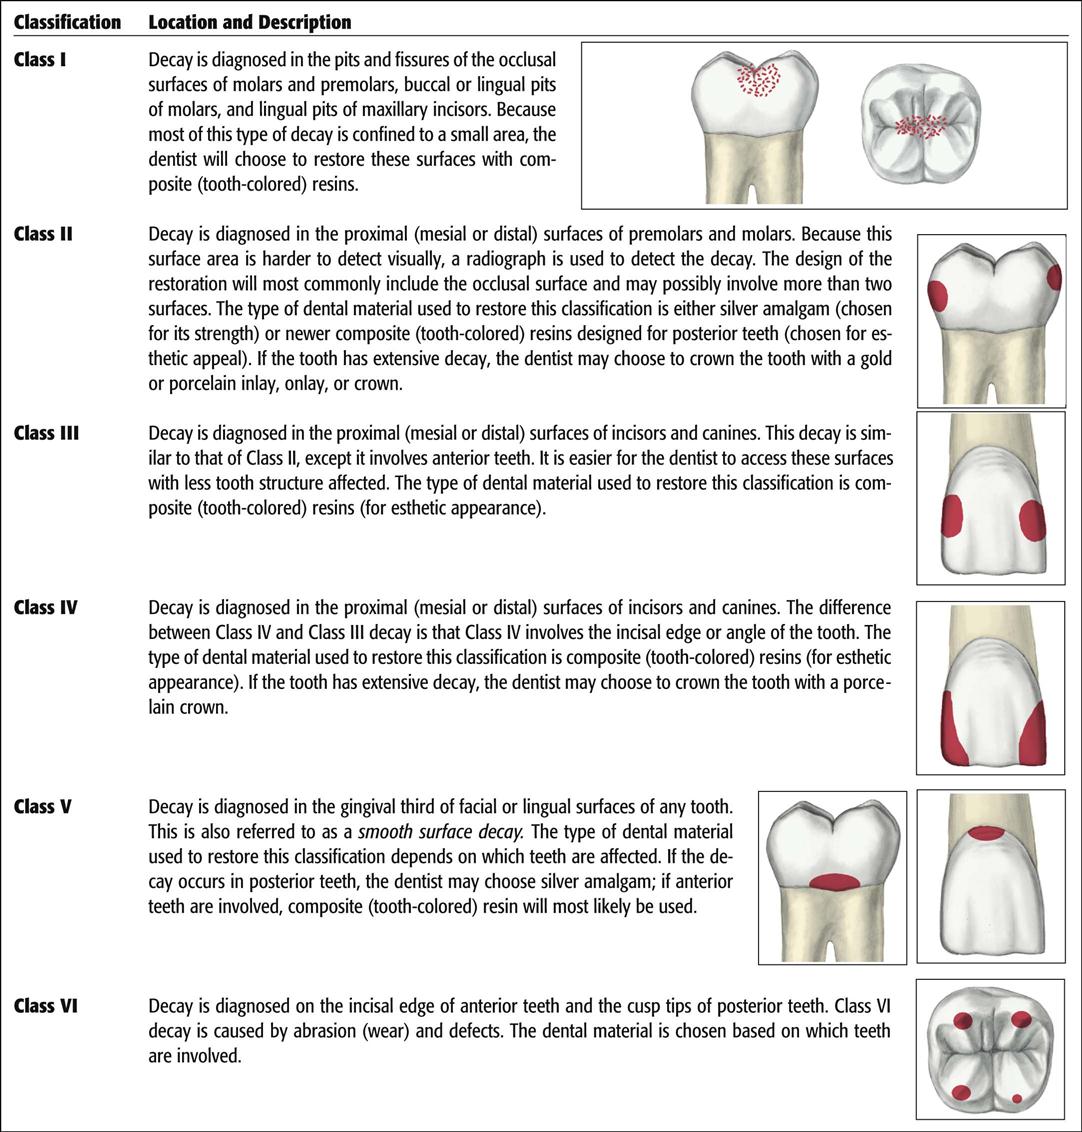
Cavity Classifications
Standard classifications are used to describe the types and locations of decay or restorations. G.V. Black (father of modern dentistry) developed the most commonly used system in the 1900s. Black’s original classification included classes I through V. Class VI was added later. Cavity classifications are described in Figure 12-3.
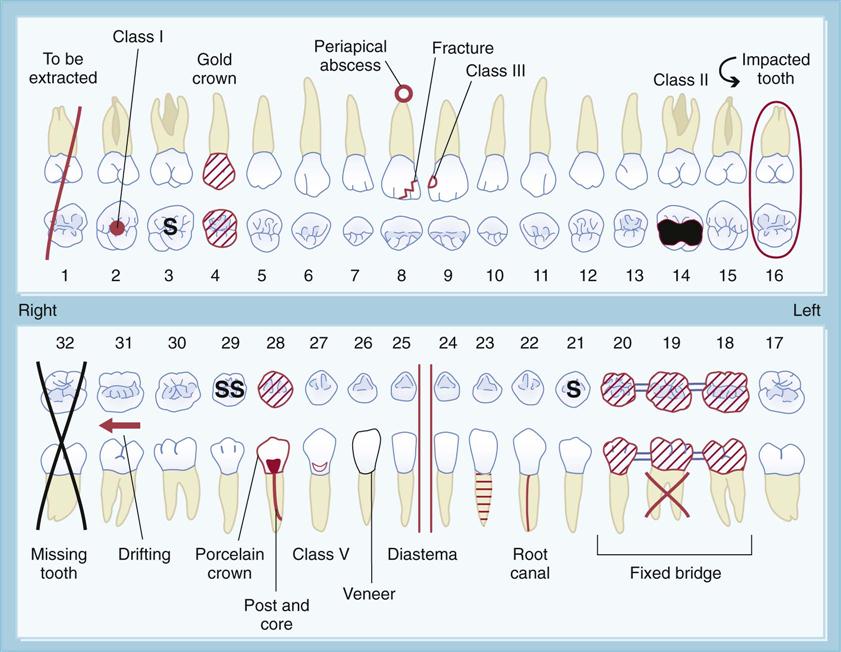
Charting Symbols
A wide variety of symbols and abbreviations are used in dentistry. Unlike the Universal Tooth Designation System and Black’s cavity classifications, which are standardized, there are many ways of using symbols and color in charting. Each dentist has his or her individual preferences, and it is important to learn the dentist’s preferred system.
The symbols shown in Table 12-2 commonly represent these conditions and materials either when charting by hand or using a dental software system.
TABLE 12-2
Commonly Used Charting Symbols
< ?comst?>
| Conditions | Charting Symbol | Description |
| Amalgam Class I Class II Class V |
   |
Outline the surfaces involved, and color in the areas in red to be completed and black/blue for already restored. |
| Composite Class I Class III Class IV Class V |
    |
Outline the surfaces involved in red to be completed and black/blue for already restored. |
| Recurrent Decay |
 |
Outline the existing restoration in red to indicate decay in the area. |
| To be extracted |
 |
Draw a red diagonal line through the tooth. An alternate method is to draw two red parallel lines through the tooth. |
| Missing tooth |
 |
Draw a black or blue “X” through the tooth. It does not matter whether the tooth was extracted, or if it never erupted, just as long as the tooth is not visible in the mouth. If a quadrant, or arch, is edentulous, make one “X” over all teeth. |
| Impacted or unerupted |
 |
Draw a red circle around the whole tooth, including the root. |
| Root canal |
 |
Draw a line through the center of each root involved in red to be completed and black/blue for already restored. |
| Fixed bridge |
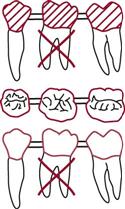 |
Draw an “X” through the root(s) of the missing tooth or teeth involved. Then draw a line to connect all teeth that make up the bridge. The type of material used to make the bridge will determine whether you outline the crowns for porcelain, use diagonal lines for gold, or use a combination of the two in red to be completed and black/blue for already restored. |
| Full crown |
 |
Outline the complete crown if it is to be a porcelain crown, or outline and place diagonal lines if it will be a gold crown (refer to tooth #4) in red to be completed and black/blue for already restored. |
| Drifting |
 |
Place a red arrow that points to the direction in which a tooth is driftin/> |
Stay updated, free dental videos. Join our Telegram channel
VIDEdental - Online dental courses


