CHAPTER 12 Blade and Plate-Form Implant Surgery
CAVEATS
The surgeon must have completed each of the steps described in Chapter 4.
The surgeon must know the presence, locations, and depth of fossae, depressions, and undercuts (see Chapter 4) and must make all osteotomies midway between the buccal and lingual cortices.
The surgeon must be aware of the floors of the antra and nose, as well as the mandibular and mental neurovascular bundles, which are critical structures. However, the bundles can be rerouted, and the antral floor can be elevated (see Chapter 8). Novel S-shaped or visor-type incisions should not be used, because the tissues between the crest of the ridge and the incision may be lost (see Chapter 7).
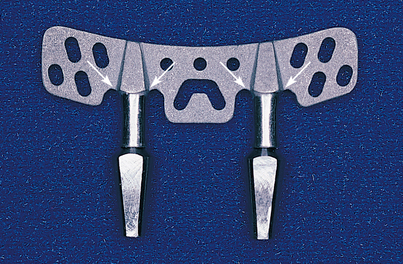
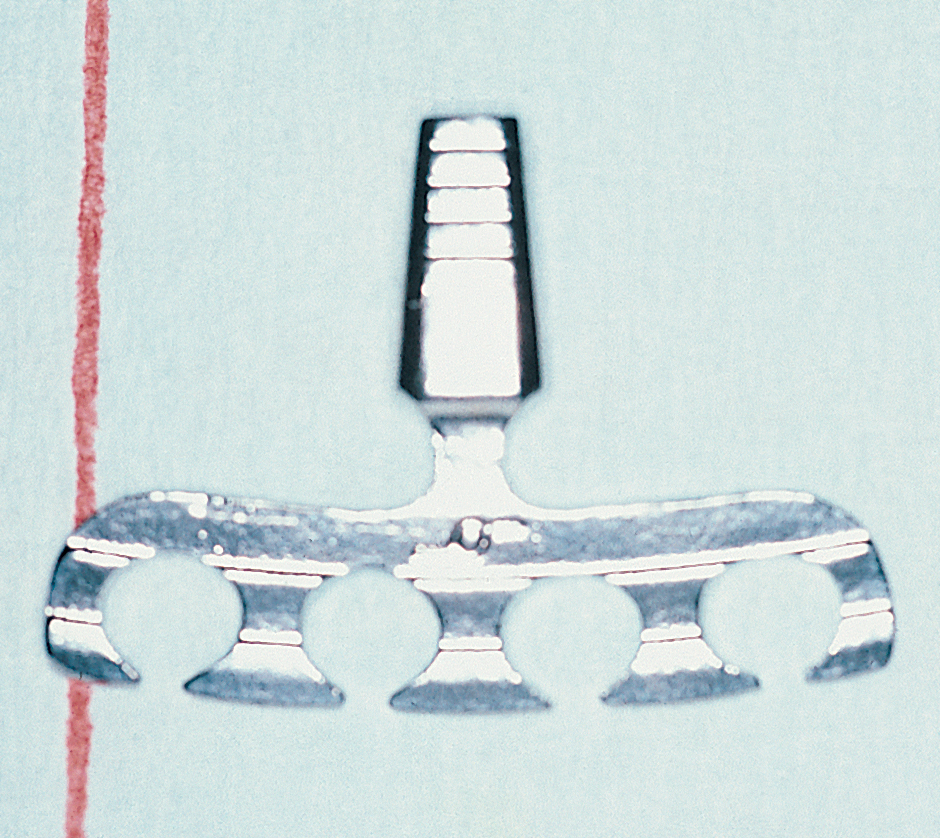
The surgeon should select implant systems that come supplied with try-ins. Blades with the anchor-shoulder-cervix configuration are preferable (Fig. 12-1).
Continuous horizontal mattress sutures are used for closure (see Chapter 6).
SURGICAL TECHNIQUES
Conventional Blade Implants: Single Stage
Incision and Reflection
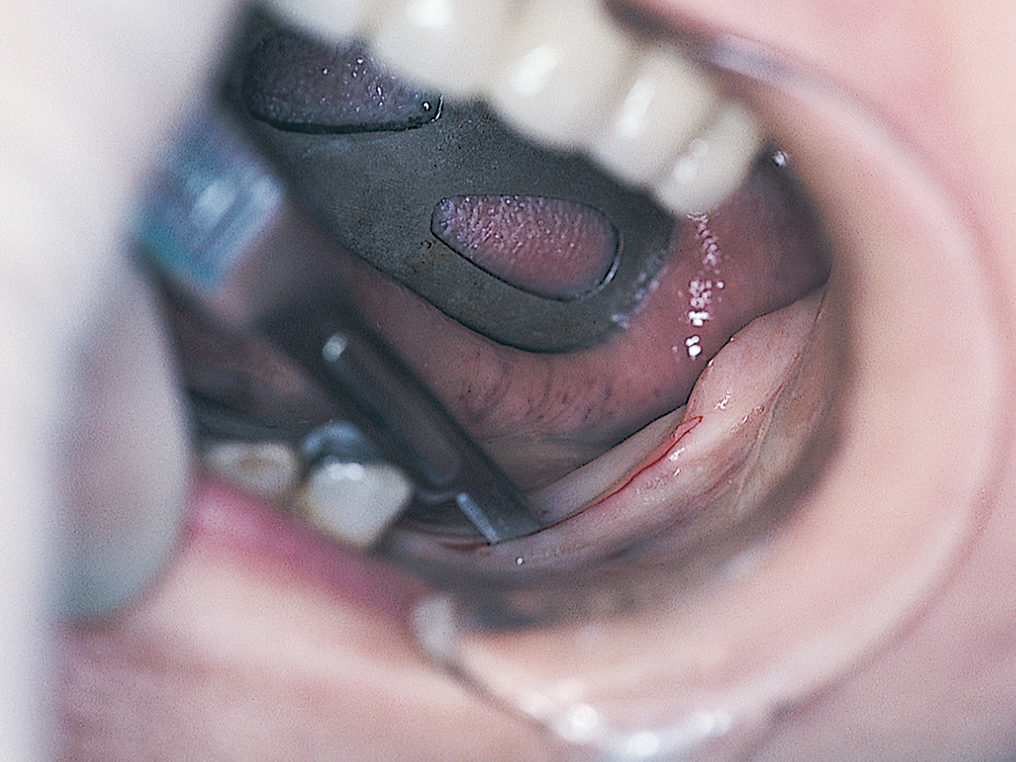
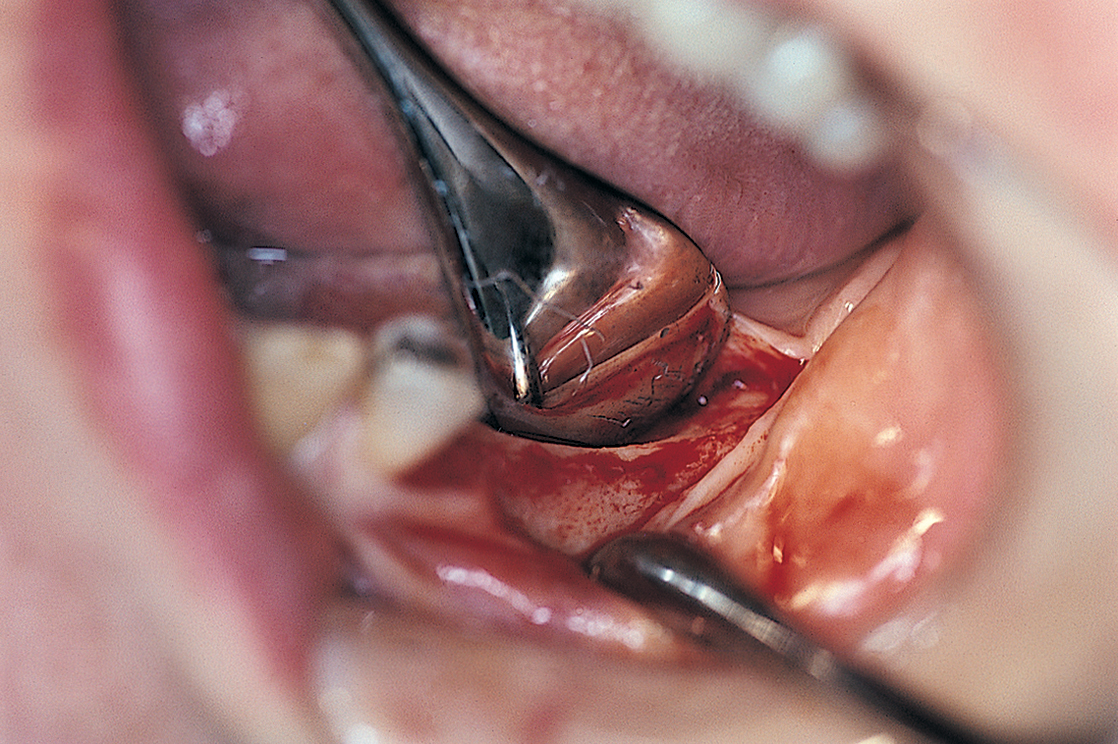
When possible, anesthesia for the posterior mandible (see Chapter 4) should be administered only by infiltration. This allows the lower lip to remain unanesthetized, which grants the surgeon the built-in protection of having the patient possibly respond as the neurovascular bundle is approached (Fig. 12-2).
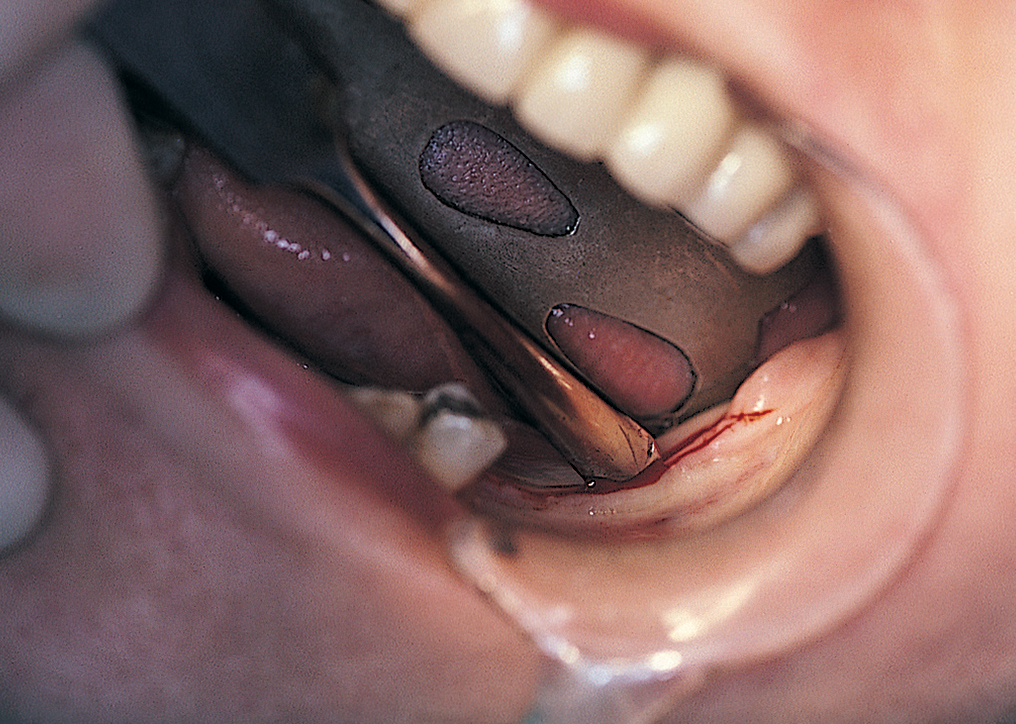
The incision should be sharp and clean so that it need not be retraced. Retracing the incision creates strips of periosteum that interfere with the gingival and superficial osseous vascular supply (Fig. 12-3).
The incision needs no buccal or lingual relief posteriorly; however, at the anterior end, it should be extended buccally and lingually around the most distal tooth in position. These two extensions offer sufficient relief to allow adequate exposure of the host bone. Reflection of the flaps is initiated anteriorly at the mesial papilla of the most distal tooth and completed by moving the elevator posteriorly (Fig. 12-4). This exposes the ridge to the base of the vestibules buccally and lingually.
The periosteal elevator should be sharp so that it incises the periosteal fibers rather than tearing them. If these fibers are resistant to the elevator, the full-thickness flap may be lifted with a mouse-tooth (Adson) forceps, and the periosteal fibers can be cut with a No. 12 blade (see Chapter 8).
The ideal location for the osteotomy is at the crest of the ridge. If the ridge is knife edged, it must be flattened (Fig. 12-5). This can be done by placing retractors (beaver tails, blunt rakes, or periosteal elevators) and using a pear-shaped diamond (SFX-30/L) in the high-speed handpiece or Impactair. A minimum width of 3 mm must be achieved.
The operative then site should be inspected, using the following steps.
Osteotomy
The surgeon is well advised to use a preoperatively prepared surgical template (see Chapter 4 for fabrication details). Once the ridge height, morphology, and width are considered acceptable, the osteotomy site is selected. A No. 1 round bur is placed in the high-speed handpiece, and after the anteroposterior length has been established by measuring the chosen implant, bur holes are made at the anterior and posterior ends of the planned groove.
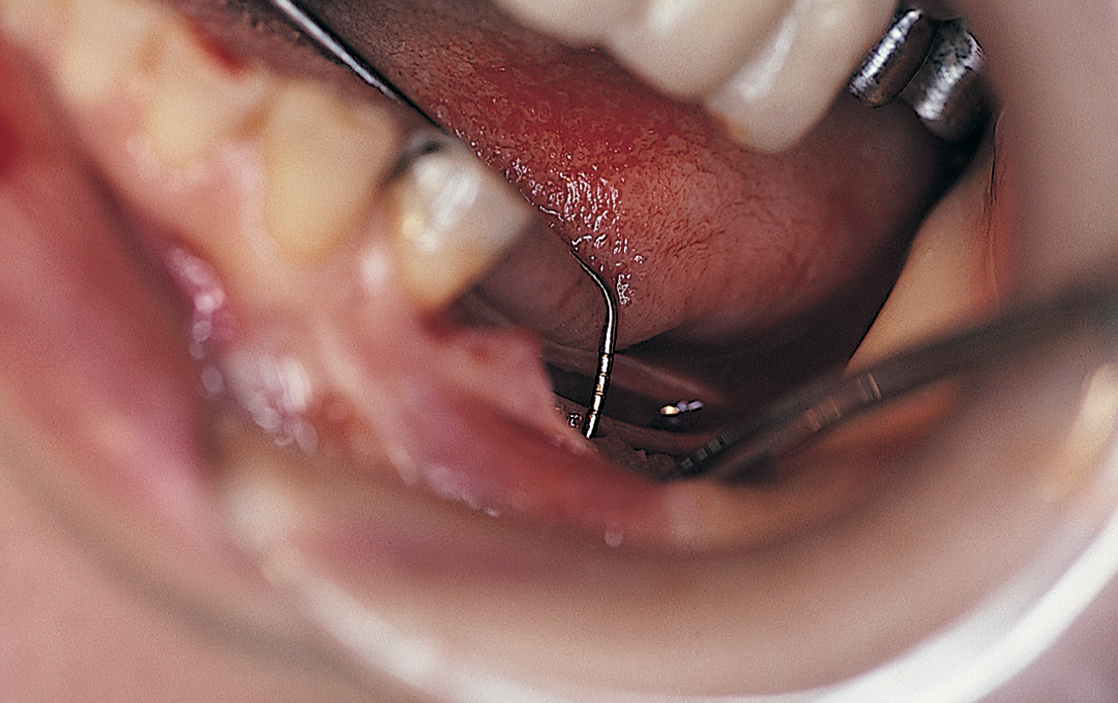
A saline-cooled, No. 1 round bur is used to make a series of bur holes just through the cortex between the anterior and posterior witness marks, along the crest of the ridge (Fig. 12-6). When this is finished, the alignment and location of the holes are assessed. If they are straight and properly located, they can be connected with a 700XXL fissure bur (Fig. 12-7). Light brushing motions and copious amounts of coolant are important. The shank of the bur is scored at the point that signifies the proper osteotomy depth. Using a firm but light grasp, the surgeon deepens the host site to the score line on the bur. The osteotomy must be deep enough to allow the shoulder to be buried beneath the bone margins to a depth of 2 mm. Any deep irregularities are flattened by brushing the bur gently through the bone groove. The osteotomy is tested with the periodontal probe to assess its depth and smoothness and to check for any cortical plate perforations (Fig. 12-8).
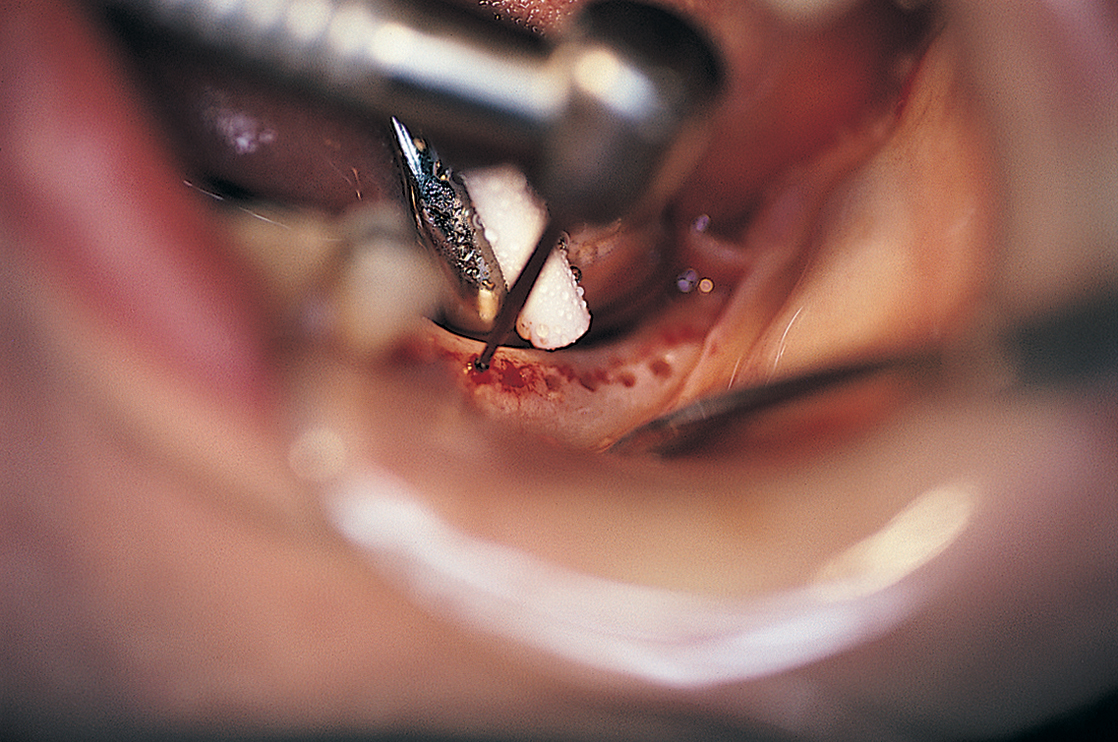
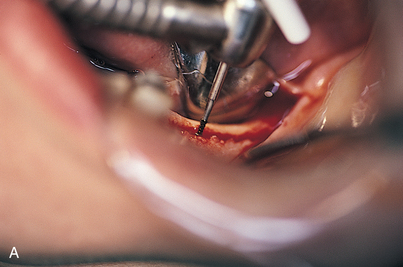
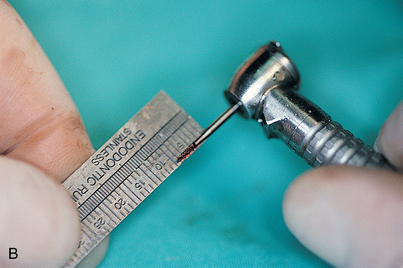

FIGURE 12-7. A, If the witness marks create an acceptable alignment, they are connected with a 700XL fissure bur. B, The depth of the osteotomy is determined from preoperative radiographs or scans (see Chapter 4) and transferred to the fissure bur shank. C, Proper depth of the osteotomy is ensured by scoring the fissure bur shank with a diamond drill. The diamond is held against the rotating bur to make an accurate mark.
Stay updated, free dental videos. Join our Telegram channel
VIDEdental - Online dental courses


