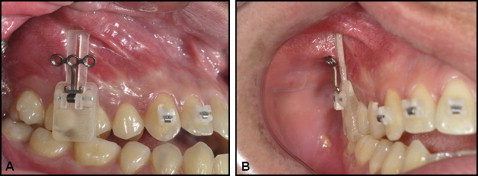
Introduction
This paper introduces a virtually planned and stereolithographically fabricated guiding system that will allow the clinician to plan carefully for the best location of the device and to achieve an accurate position without complications.
Methods
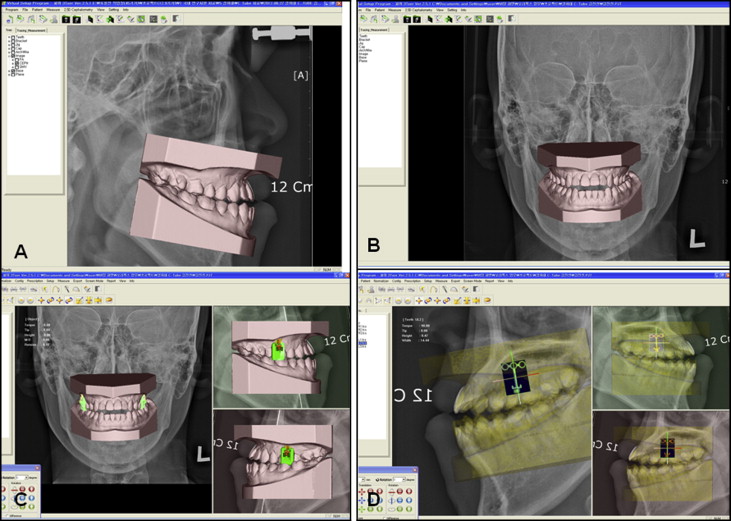
The scanned data from preoperative dental casts were edited to obtain preoperative 3-dimensional (3D) virtual models of the dentition. After the 3D virtual models were repositioned, the 3D virtual surgical guide was fabricated. A surgical guide was created onscreen, and then these virtual guides were materialized into real ones using the stereolithographic technique.
Results
Whereas the previously described guide required laboratory work to be performed by the orthodontist, our technique is more convenient because the laboratory work is done remotely by computer-aided design/computer-aided manufacturing technology. Because the miniplate is firmly held in place as the patient holds his or her mandibular teeth against the occlusal pad of the surgical guide, there is no risk that the miniscrews can slide on the bone surface during placement. The software program (2.5-dimensional software) in this study combines 2-dimensional cephalograms with 3D virtual dental models. This software is an effective and efficient alternative to 3D software when 3D computed tomography data are not available.
Conclusions
To confidently and safely place a miniplate with screw fixation, a simple customized guide for an orthodontic miniplate was introduced. The use of a custom-made, rigid guide when placing miniplates will minimize complications such as vertical mislocation or slippage of the miniplate during placement.
Compared with mini-implants (sandblasted with large grit followed by acid etch [SLA]-coated) or miniscrews (machine surface screw), the use of miniplates as temporary skeletal anchorage devices has certain benefits. The miniplate devices are more stable and offer less risk of damage to nearby dental roots. Researchers have reported that location and timing of force application are conditions that can influence the success of conventional mini-implants in interradicular spaces. Root proximity is a major factor for mini-implant failure in orthodontic anchorage applications.
With the C-tube miniplate (Jin-Biomed Co, Bucheon, Korea), the mean placement depth of the miniplate’s anchoring screw is 2.48 mm, which allows fewer complications than do longer miniscrews or mini-implants. To minimize the risks of damage to the adjacent roots or the cortical bone of the sinus wall, slippage of the screw during driving, or path-of-insertion angulation errors that might interfere with the accurate placement of the miniplate’s anchoring screw, surgical guides have been designed. Paek et al proposed a simple customized surgical guide made of silicone material with a positioning wire. However, a virtually planned and stereolithographically fabricated guiding system will allow the clinician to plan carefully for the best location of the device and to achieve an accurate position without the afore-mentioned risks.
Although several 3-dimensional (3D) programs have been introduced to reduce manual laboratory steps and potential errors, these programs still require 3D computed tomography data and involve complex computerized maneuvers. Because it is not appropriate to take 3D computed tomography scans for all patients, a new protocol has been introduced using 2-dimensional (2D) lateral and posteroanterior cephalograms and 3D virtual dental models (2.5D program, 3Txer version 2.5; Orapix, Seoul, Korea). In this report, the 2.5D program was used to fabricate the surgical guide with the stereolithographic technique.
The purpose of this article is to introduce this novel way of virtually fabricating the surgical guide for placement of C-tube miniplates.
Material and methods
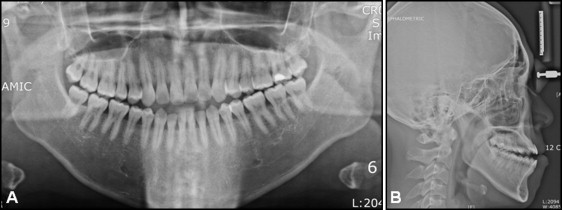
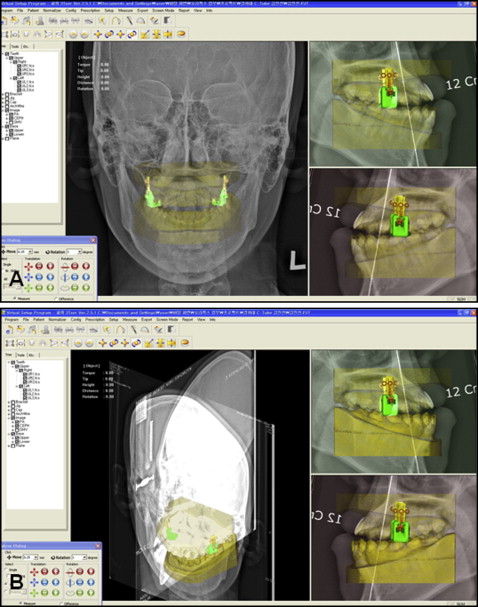
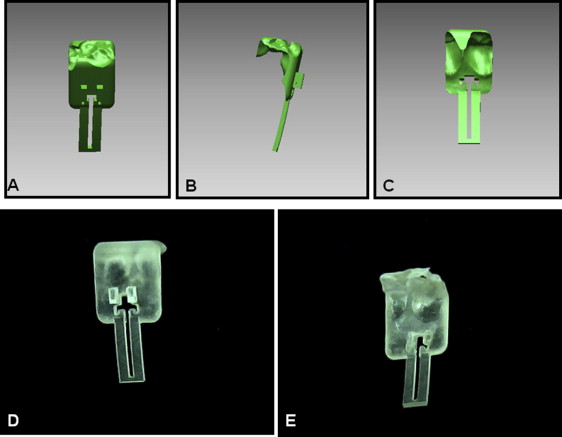
Preoperative dental casts were obtained with alginate impressions, using a centric occlusion wax bite and preoperative radiographs ( Fig 1 ). Casts were shipped to Orapix (Seoul, Korea), where they were scanned with the proprietary 3D laser scanner (accuracy of 30 μm). The acquired scan data were edited to obtain preoperative 3D virtual casts using a 3Dxer and 3Txer program ( Fig 2 , A and B ). The incisor edge of the maxillary right central incisor and the most distal point of the maxillary right second molar crown were digitized in both the 3D virtual maxillary dental cast and the 2D lateral cephalograms. Then the 3D virtual maxillary dental cast was automatically fitted into the maxillary dentition portion of the 2D lateral cephalograms by adjustment of the distance between these 2 points and matching the angulation of the line. The outermost buccal points of the crowns of the maxillary right and left second molars were digitized in both the 3D virtual maxillary dental model and the 2D posteroanterior cephalograms. Then the 3D virtual maxillary dental model was automatically fitted into the maxillary dentition portion of the 2D posteroanterior cephalograms. The 3D virtual mandibular dental cast automatically replaced the mandibular dentition portion of the 2D lateral and posteroanterior cephalograms using the set position with the 3D virtual maxillary dental cast. As a result, the 3D virtual maxillary and mandibular dental casts could be combined with the 2D cephalograms in the 3D Cartesian coordinate system. After the 3D virtual casts were repositioned, the 3D virtual surgical guide was fabricated ( Fig 2 , A and B ). After the correct miniplate position was determined by the doctor’s prescription on the virtual casts, the best size of virtual miniplate was selected from the software library and tentatively placed using the software (usually between the second premolar and the first molar) ( Figs 2 , C and D , and 3 ) After the position was confirmed by the doctor, a surgical guide was created on the screen, and these virtual guides were materialized into real ones using the stereolithographic technique ( Figs 4 and 5 ).
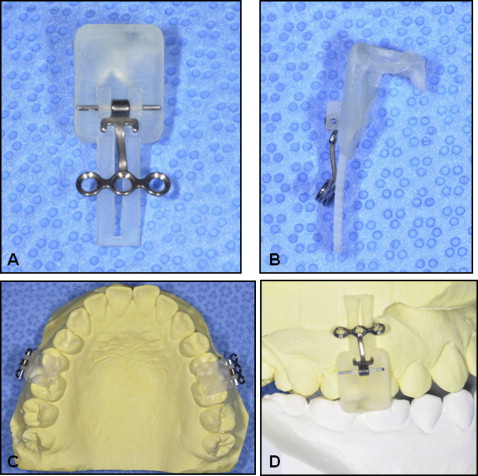
The surgical guide was adapted to the clinical site after local anesthesia ( Fig 6 ). The miniplate can be slid along the horizontal wire for an easy incision ( Fig 7 , A ). A minimal incision was made with a number 15 scalpel blade ( Fig 7 , B and C ), and then the positioning sleeve was removed after the incision ( Fig 7 , D and E ). The sleeve is made of stereolithography resin so that it is easy to snap off the guide ( Fig 7 , F ). Once the positioning sleeve was removed, the miniplate was flipped vertically, slipped into the incision, and placed on the underlying bone ( Fig 8 , A and B ). Because the miniplate is firmly held in place as the patient holds his or her mandibular teeth against the occlusal pad of the surgical guide, there is no risk that the miniscrews (diameter, 1.5 mm; length, 4 mm) will slide on the bone surface during placement. A manual hand driver is adequate to drive the self-drilling miniscrews ( Fig 8 , C-F ). All screws were placed, and the guide was removed by slipping out the steel wire axle from the guide ( Fig 9 , A and B ). Minimal sutures were placed using 4-0 silk to close the incision ( Fig 9 , C and D ). The miniplate was buried under mucosa at the mucogingival junction, and the tube part of the C-tube miniplate was exposed for access to skeletal anchorage. After 1 week of healing, the sutures were removed, and the C-tubes were loaded. A postoperative computed tomography scan was taken, and no complication was observed ( Fig 10 ). The C-tube guide has a clinical advantage for mandibular anterior teeth ( Fig 11 ). As in the previously described biocreative technique, preadjusted 0.022-in fixed appliances were bonded only on the maxillary anterior 6 teeth, which were then retracted against the C-tubes without requiring any attachments on the maxillary posterior teeth. This is beneficial because when the posterior teeth are engaged during temporary skeletal anchorage device retraction, they will typically be distalized, but this might not be desired. The C-tubes were comfortable for the patient throughout the entire orthodontic treatment and were easily removed with a minor incision.

