Provisional Coverage
Learning Outcomes
On completion of this chapter, the student will be able to achieve the following objectives:
• Pronounce, define, and spell the Key Terms.
• Discuss the indications for provisional coverage for a crown or fixed-bridge preparation.
• Describe the types of provisional coverage.
• Discuss the dental assistant’s role in making a provisional crown or bridge.
Performance Outcomes
On completion of this chapter, the student will be able to achieve competency standards in the following skills:
• Fabricate a custom acrylic provisional crown.
• Fabricate a custom acrylic provisional bridge.
• Fabricate a direct provisional crown from a preformed polymer crown.
Electronic Resources
 Additional information related to content in Chapter 51 can be found on the companion Evolve Web site.
• Interactive Dental Office Patient Case Study: Chester Higgins
• Procedure Sequencing Exercises
• WebLinks
 and the Multimedia Procedures DVD
Key Terms
Custom provisional Pertaining to coverage designed from a preliminary impression or thermoplastic tray resembling the tooth being prepared.
Polycarbonate (pol-ee-KAHR-buh-nayt) crown Provisional crown made from a hard plastic tooth-colored material used for anterior teeth.
Polymer crown Provisional coverage designed in a shell-like form.
Preformed Referring to provisional coverage that is already shaped as needed.
Provisional Pertaining to temporary coverage made for crown or bridge preparations and worn during cast preparation.
Stainless steel crown Thin aluminum crown made from a medium-hard material for good durability.
Provisional coverage is a temporary protective crown or bridge that is temporarily cemented to a tooth that has been prepared to receive a single crown, or to the abutment teeth for a fixed bridge. The patient will wear the provisional coverage while the dental laboratory technician prepares the fixed prosthesis.
A provisional crown or bridge restores and maintains function to that area of the mouth and keeps the patient comfortable during the period from tooth preparation to final cementation. In most cases, this period can range from 2 weeks to 1 month. Occasionally, a patient is required to wear the provisional prosthesis for a longer period to accommodate a more complex treatment plan. This type of treatment typically involves implants or periodontal therapy.
Indications for provisional coverage include the following:
• To prevent or reduce sensitivity and discomfort of the prepared tooth and surrounding tissues
• To maintain the function and esthetics of the tooth
Types of Provisional Coverage
Two types of provisional coverage are commonly used: custom and prefabricated. The dentist will determine the type of coverage needed according to the individual’s case and oral condition. The construction and temporary cementation of provisional coverage may be an expanded function in the state in which you practice. If this is the case, this procedure may be delegated to you as a major role in your clinical position.
Custom Provisional
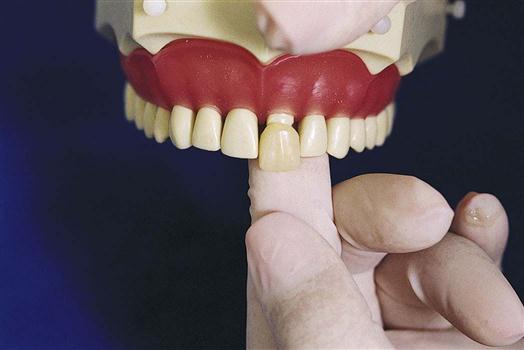
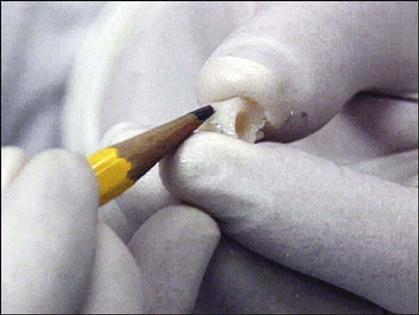
A custom provisional represents the most common type of temporary coverage used for crown and bridge preparations (Fig. 51-1). Custom preparations can be the most time-consuming dental prostheses to make, but they provide the best-fitting and most natural-looking restoration. This custom technique can be used for posterior or anterior crowns or bridges. See Procedures 51-1 and 51-2.
PROCEDURE 51-1 


Fabricating and Cementing a Custom Acrylic Provisional Crown (Expanded Function)
Prerequisites for Performing this Procedure
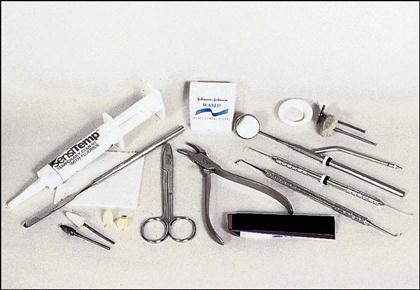
Equipment and Supplies
✓ Alginate impression (obtained before preparation of the teeth)
✓ Self-curing acrylic resin (liquid and powder)
✓ Spatula (small, cement type)
✓ Mixing container/dappen dish
✓ Scissors
✓ Burnisher (“beaver tail” or ball)
✓ Straight handpiece and mandrel
✓ Finishing diamond, discs, or burs
Procedural Steps
1 Obtain an alginate impression of the arch before the teeth are prepared.
Purpose: You want the provisional coverage to be a replica of the tooth before the dentist prepares it.
3 Disinfect the impression and keep moist until needed.
Purpose: If allowed to dry, the impression will be distorted, and the provisional coverage will not fit.
4 Isolate the prepared tooth with cotton rolls to maintain moisture control.
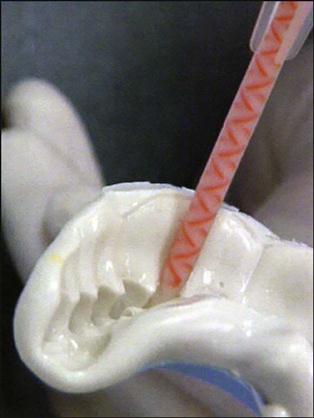
6 If using the liquid/powder acrylic material, place the liquid monomer in the glass dappen dish; 10 drops of liquid per unit is recommended. Quickly dispense the selected shade of self-curing powder (polymer) into the monomer until the powder is saturated.
Important: Cover the monomer container immediately; this material is volatile.
Note: If using the syringe-type acrylic material, skip to step 9.
7 Use a small spatula to blend the powder and liquid to a homogeneous mix.
8 Set the mixed material aside for 1 to 2 minutes until the resin reaches a doughy, less glossy stage.
Important: Do not let the resin cure beyond this point.
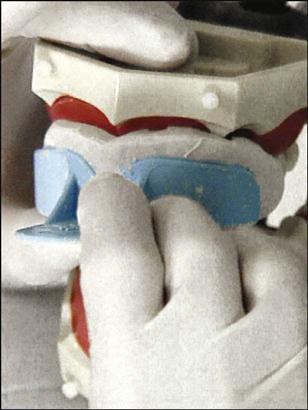
10 Remove the resin from the mixing container with a small spatula, and immediately place it within the area of the prepared teeth.
Optional: Express the acrylic resin from a syringe directly into the impression.
11 Place the acrylic-loaded impression back into the patient’s mouth on the prepared tooth or teeth.
13 Carefully remove the provisional coverage from the alginate impression, and place it onto the patient’s teeth.
Purpose: To avoid excess shrinkage during the final curing stage.
15 Trim the acrylic resin to within 1 mm of the gingival shoulder of the prepared tooth with an acrylic bur or stone.
Note: Any trimming completed by the EFDA must be completed outside the mouth with the low-speed handpiece and acrylic burs.
Stay updated, free dental videos. Join our Telegram channel
VIDEdental - Online dental courses


