Chapter 4
Instrument Decontamination
Aim
This chapter discusses the principles of instrument decontamination including cleaning, autoclaving and aseptic storage.
Outcome
After reading this chapter, you will understand how to operate a decontamination station and to check that it works safely.
Protocols and Training
Written protocols for decontamination of reusable instruments and for the safe disposal of single-use instruments must be produced. All staff involved in the treatment of patients and decontamination must be aware of these protocols and be trained in the use of the equipment involved. Records of training and regular updates should be kept.
Critical, Non-critical and Disposable Instruments
Before deciding how to decontaminate instruments, it is important to decide what instruments need to go through this process and which do not. Items such as the patient’s protective glasses and bib chains do not normally get significantly contaminated with saliva or blood and are classified non-critical instruments. These non-critical instruments can be safely washed with detergent and dried before reuse.
The majority of instruments are significantly contaminated with saliva and blood and are called critical and need full decontamination. Some of the critical instruments are marked for single-use and must be disposed of safely. Other critical instruments are extremely difficult to clean effectively, for example, lumened instruments such as aspirator tips, which can be usefully replaced with typically relatively inexpensive, single-use items. Other critical instruments are complex in form, such as matrix bands and retainers, and decontamination may be time consuming and possibly present a risk of sharps injuries. Again, consideration should be given to replacing such items with single-use products.
As a general rule, difficult-to-clean and sharp instruments, which may pose a hazard to staff involved in handling contaminated instruments, should be disposable. Some national bodies may mandate some specific items of equipment as disposable; for example, in the United Kingdom, all endodontic files and reamers have been designated for single-use by the Department of Health.
Decontamination
The term decontamination is often thought, incorrectly, to just mean cleaning of instruments. Decontamination encompasses both cleaning and sterilisation and safe, aseptic storage. Places in dental surgeries where these functions are undertaken are often called decontamination stations. This chapter will discuss in detail how to operate, test and validate a decontamination station within a dental practice.
Choosing decontamination equipment
-
Choosing equipment needs to be done with current and future needs in mind.
-
The equipment needs to be fit for purpose and be designed and built to contemporary standards.
-
Capacity should be at least adequate for current needs.
-
In large practices, consideration should be given to buying several smaller capacity machines as opposed to a single, large machine. This will allow a degree of flexibility in the event of breakdown, routine maintenance and testing. It will also allow staggered cycle times to increase throughput.
-
There should be good back-up arrangements in the event of malfunction and maintenance.
-
There should be a training package included in the purchase of the equipment.
-
Consideration should be given to leasing rather than purchasing equipment; this is often more cost effective and puts the responsibility for maintenance and testing on the supplier.
Instrument Cleaning
The first and most essential part of instrument decontamination is cleaning. If an instrument is not completely clean, then micro-organisms can be protected by adherent detritus from the sterilisation process and remain viable. The methods used for cleaning are manual, enzymatic agents, ultrasonics and washer disinfectors. The only safe and reproducible methods of cleaning are by means of washer disinfectors or possibly ultrasonic baths.
Manual cleaning of instruments
Hand cleaning of instruments is not effective or reliable. Even the most assiduous use of detergent, water and a brush does not completely, or reproducibly, clean dental hand instruments. Manual cleaning of instruments is also dangerous as sharp instruments are handled when they are maximally contaminated after use. Hand cleaning can be used for the removal of stubborn detritus after a mechanical process has been used, but appropriate precautions need to be taken.
Proteolytic agents
Proteolytic agents contain enzymes, which break down proteins and possibly split carbohydrates. They are useful for heavily contaminated instruments requiring a precleaning soak, in particular, if there is a lot of adherent organic material. Often containers filled with these enzymes are used as “holding tanks” prior to cleaning in a washer disinfector or an ultrasonic bath. This can prevent contamination from drying on the instruments, which makes removal all the more difficult. Proteolytic agents should not be used as a substitute for washer disinfectors or ultrasonic baths, but at most as an adjunct.
Ultrasonic baths
A common method for cleaning instruments is by means of an ultrasonic bath (Fig 4-1). This consists of a water bath to which is attached an ultrasound generating device (transducer). This sends sound waves through the liquid at frequencies of usually greater than 20,000 cycles per second. These sound waves cause the liquid to flow back and forth in relation to the sound. An instrument immersed in the bath has liquid pushed towards it, then away from it under intense high pressure causing small “cavities” to form. The cavities are unstable and the liquid literally collapses against the instrument transferring energy to it and shaking it. It is this cavitation and transfer of energy that effectively lifts detritus from the surface of the instrument.
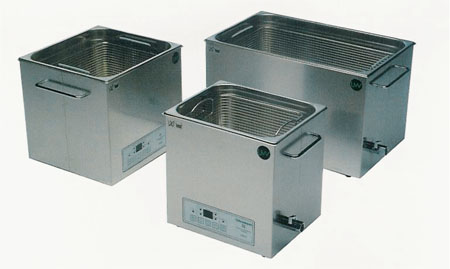
Fig 4-1 Common design of ultrasonic bath found in dental practice. Courtesy of Medisafe Ltd.
Ultrasonic baths work effectively if:
-
they are properly commissioned before use
-
they are tested periodically – at least every 3 months is usually recommended
-
they are loaded appropriately
-
they are used with a recommended detergent at the correct concentration and temperature
-
they are used uninterrupted for the time recommended by the manufacturers
-
they are fitted with a printout of the cleaning cycle
-
the liquid is changed regularly and the internal parts of the tank scrubbed to remove adherent material – every three hours is usually recommended for general use, but more often if instruments cleaned in the bath are heavily soiled
-
the users are provided with a written protocol on how to use the bath and have been trained in its use.
Before an ultrasonic bath is used the liquid in it needs to be degassed by starting the machine and running it without a load for the time recommended in the manufacturer’s directions for use. The loading and operating time of an ultrasonic bath is critical.
Care must be taken not to overlap the instruments in the bath (Fig 4-2) and not to interrupt or add instruments during the cleaning cycle. Some ultrasonic baths are now fitted with a time lock to prevent cycle interruptions and a printer to record cycle parameters (Fig 4-3). Ultrasonic baths should be cleaned and dried when not in use.
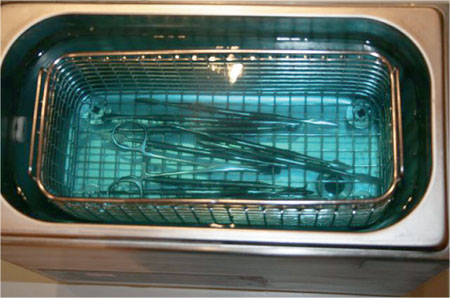
Fig 4-2 Correct loading of instruments in ultrasonic bath. There should be no overloading of the chamber, with space around each instrument; hinged instruments should be opened.
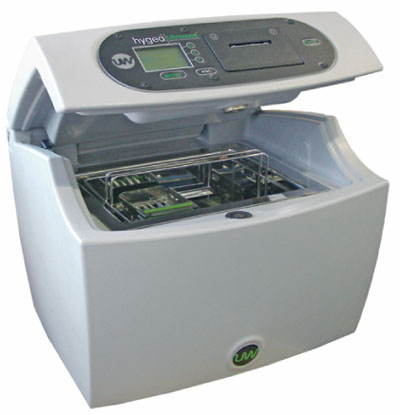
Fig 4-3 Ultrasonic bath with interlocking lid and printer displaying cycle parameters. Courtesy of Ultrawave Ltd.
Testing an ultrasonic bath is usually done with strips of aluminium foil cut 20 mm wide and 10 mm long, suspended just above the bottom of the tank. The tank is first degassed and at least nine strips, weighted down with paper clips, are suspended just above the bottom of the tank with adhesive tape (Fig 4-4). The tank is then run for the manufacturer’s recommended operating time and the strips removed and examined. The strips should show even corrosion. If there is no corrosion, then the sound transducers may not be working, or may have become detached from the bath.
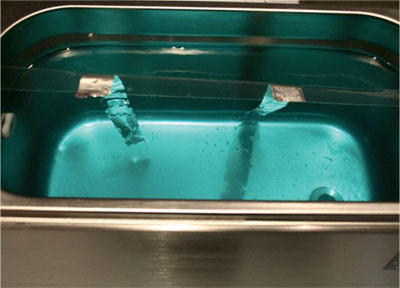
Fig 4-4a Ultrasonic bath with interlocking lid and printer displaying cycle parameters. Courtesy of Ultrawave Ltd.
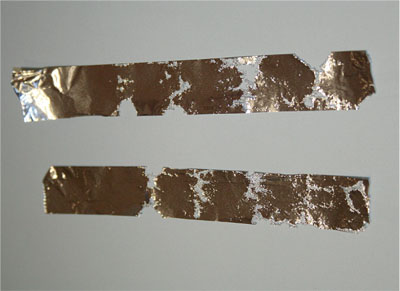
sFig 4-4b Foil ablation test strips demonstrating erosion pattern. Courtesy of Medisafe Ltd.
Ultrasonic baths effectively remove blood and saliva from instruments, but are not effective in the removal of prions. Most ultrasonic baths are not suitable for cleaning dental handpieces. Some baths have irrigation devices in them, which aid in the cleaning of handpieces, but it is best to check with the manufacturer of the handpieces to be cleaned to ascertain whether ultrasonic cleaning is appropriate.
Washer disinfectors
Washer disinfectors are the preferred option for cleaning instruments before sterilisation (Figs 4-5 and 4-6). The reason is that, if properly commissioned, tested and validated, washer disinfectors clean instruments effectively, reproducibly and reduce the need for staff to handle contaminated instruments.
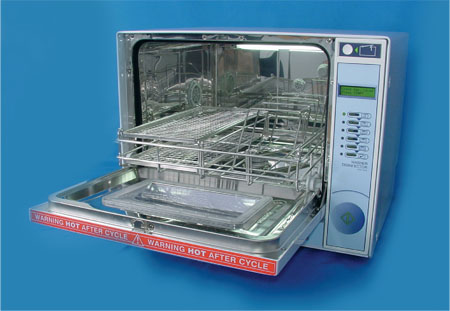
Fig 4-5 Benchtop washer dis-infector. Courtesy of Medisafe Ltd.
Stay updated, free dental videos. Join our Telegram channel
VIDEdental - Online dental courses


