Oral Diagnosis and Treatment Planning
Learning Outcomes
On completion of this chapter, the student will be able to achieve the following objectives:
• Pronounce, define, and spell the Key Terms.
• List and describe the examination and diagnostic techniques used for patient assessment.
• Discuss the role of the dental assistant in the clinical examination.
• List the six categories of Black’s classification of cavities.
• Differentiate between an anatomic and a geometric diagram for charting.
• Explain the color coding of a chart diagram.
• Describe the need for an extraoral examination.
• Describe the pocket depth and bleeding index of the gingival tissues and the recording process.
Performance Outcomes
On completion of this chapter, the student will be able to meet competency standards in the following skills:
• Take intraoral and extraoral photographs of a patient’s mouth.
Electronic Resources
 Additional information related to content in Chapter 28 can be found on the companion Evolve Web site.
Key Terms
Detection Act or process of discovering tooth imperfections or decay.
Extraoral Outside the oral cavity.
Furcation (fur-KAY-shun) Area between two or more root branches.
Intraoral Within the oral cavity.
Mobility To have movement.
Morphologically (mor-fuh-LOJ-i-kul-lee), morphologic (mor-fuh-LOJ-ik), morphology (mor-FOL-uh-jee) Branch of biology that deals with form and structure.
Palpation (pal-PAY-shun) Touching or feeling for abnormalities within soft tissue.
Probing Use of a slender, flexible instrument to explore and measure the periodontal pocket.
Restoration The use of a dental material to restore a tooth or teeth to a functional permanent unit.
Symmetric (si-MET-rik) Balanced or even on both sides.
Sound dental care begins with a thorough examination of the head, neck, and oral cavity. For the dentist to make an accurate diagnosis, he or she must first review the medical and dental history and discuss all health concerns with the patient; then continue with a thorough extraoral and intraoral examination; evaluate the radiographs, photographs and study models; and finally discuss the plan of treatment.
A patient will seek dental care for the following reasons:
• As a new patient to begin dental care
• As an emergency patient when in pain or experiencing discomfort
• For consultation with a specialist for a specific condition
The dental team is especially involved at this stage of the patient’s dental care. Specific areas in which the dental assistant should be involved include the following: assist the patient with completion of patient information forms; take and record vital signs; chart and record the dentist’s findings during extraoral and intraoral examinations; expose intraoral and extraoral radiographs; take preliminary impressions and fabricate diagnostic models; take extraoral and intraoral photographs; organize the patient record; and prepare for the case presentation.
Examination and Diagnostic Techniques
Today, in the field of dentistry, advanced technology allows the dentist to reach a more accurate conclusion than ever before. The techniques discussed in this chapter are valuable in helping the dentist determine the patient’s dental status. Once the required assessments have been completed, the dentist will recommend a treatment plan to the patient.
Visual Evaluation
The dentist must be able to distinguish between symptoms described by the patient and visual clues. The examination always begins with a visual evaluation of the patient’s extraoral and intraoral conditions. This enables the dentist to determine an overall assessment of the type of dental care received previously and reveals any existing conditions that have not been treated. Specific examination areas include face, lymph nodes, lips, soft tissue within the mouth, tongue, tooth structure, restorations, and missing teeth.
The soft tissue should appear light pink and uniform in color with no indications of swelling or inflammation. If areas of soft tissue appear reddened and not uniform in color, this should be noted in the soft tissue portion of the clinical examination form, and a more extensive evaluation should be completed.
Tooth structure should appear morphologically sound and intact. The dentist will use the mouth mirror, dental light, and air from the air-water syringe to look for any imperfections in the enamel. Unhealthy tooth structure can appear discolored or chipped, or may have an abnormal morphologic appearance. The dentist will evaluate each restoration for discrepancies and complete coverage of tooth structure. All missing teeth and abnormalities are noted in the charting section of the clinical examination form.
It is essential for the clinical assistant to have the competence in knowing the names and numbering systems of the teeth, as well as charting system used during a clinical examination procedure (see later discussion).
Palpation
Palpation is an examination technique in which the examiner uses his or her fingers and hands to feel for texture, size, and consistency of the hard and soft tissue (see Chapter 9 for a review of the basic anatomy and physiology of the head and neck). This technique is especially useful for detecting extraoral swelling and is the primary way of detecting swollen lymph glands.
Instrumentation
Instrumentation is the use of dental instruments to examine the teeth and surrounding tissues. The instrument enables the dentist or the dental hygienist to further evaluate areas that were first examined visually. The type of instrument commonly utilized to examine the teeth is the mouth mirror and explorer, and to examine gingival tissues, the periodontal probe. For further description of dental instruments, see Chapter 34.
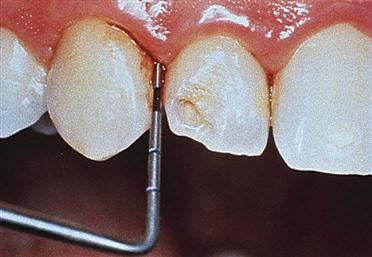
Detection
The dentist uses an explorer, which is a sharp, pointed instrument, designed in a specific way to detect imperfections in tooth surfaces (Fig. 28-1). Besides detection of new disease, the dentist will use the explorer to evaluate existing restorations and all dental work for stability and integrity.
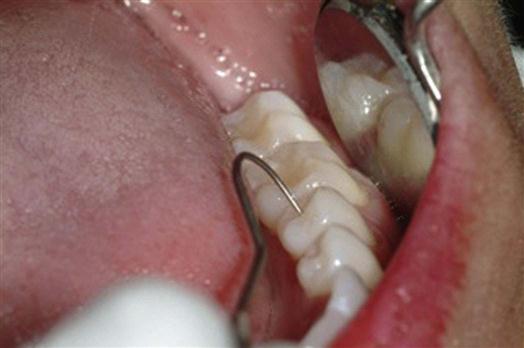
Probing
The dentist or dental hygienist will use the periodontal probe to assess the gingiva for the presence of periodontal pockets from the loss of gingival attachment or bone (Fig. 28-2). Periodontal probing is a technique used to detect periodontal disease.
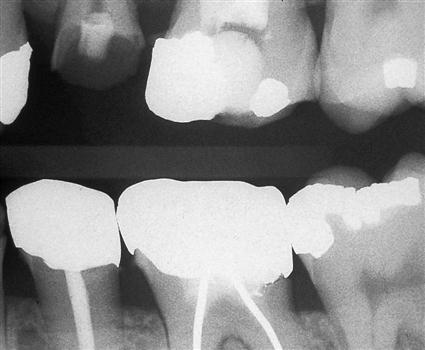
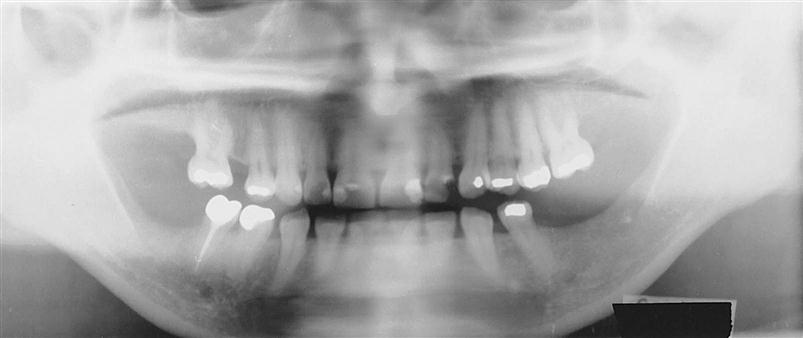
Radiography
Radiographic imaging has become an indispensable tool for identifying decay, defective restorations, periodontal conditions, pathology, developmental conditions, and other abnormalities. The dentist’s decision to take intraoral radiographs (Fig. 28-3) versus extraoral radiographs (Fig. 28-4) will depend on what needs to be examined and what provides the best diagnosis (see Chapters 38 to 42).
Intraoral Imaging
Intraoral imaging is similar to the use of a miniature video camera. This technique allows the dentist to use a computer monitor as a complement to a video camera system, with a display of live video on a monitor screen (Fig. 28-5). The intraoral camera provides the dentist with the following:

Photography
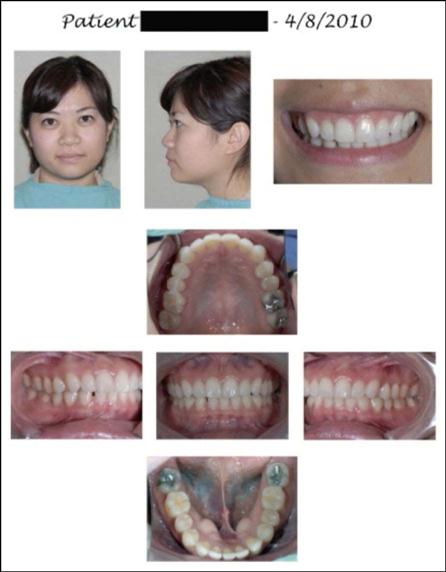
Photography is a diagnostic tool used for intraoral and extraoral structures. Photographs provide the dentist and the patient with a visual means of identifying and understanding specific problems (Fig. 28-6). For comprehensive treatment such as reconstructive or orthodontic procedures, a patient will have before-and-after photographs taken to illustrate the changed results (Procedure 28-1).

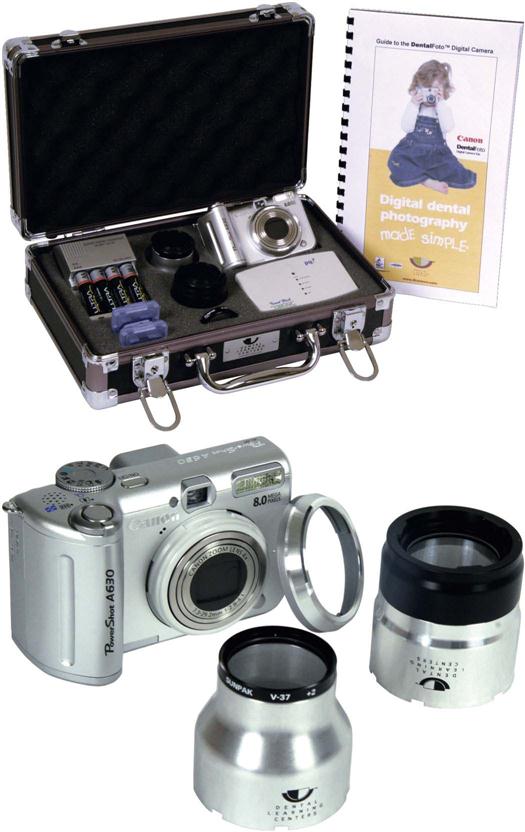
PROCEDURE 28-1 
Extraoral and Intraoral Photography (Expanded Function)
In many states, this procedure can be performed by certified dental assistants.
Equipment and Supplies
Readying Your Camera
1 Calibrate the camera system so that you become familiar with the settings for intraoral and extraoral photographs.
Note: For intraoral photography, set your camera to landscape mode, and for extraoral photography, use the portrait mode.
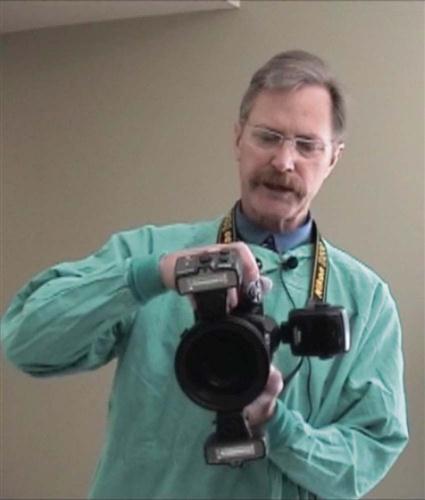
2 Use of manual focus is recommended, as auto-focus can be unreliable in the oral cavity.
Note: In general, for anterior teeth, focus on the central and lateral incisors to ensure that the maximum number of teeth are in focus.
Readying Your Patient
1 For extraoral photographs, you want to be 5 to 6 feet from your patient with a neutral color background.
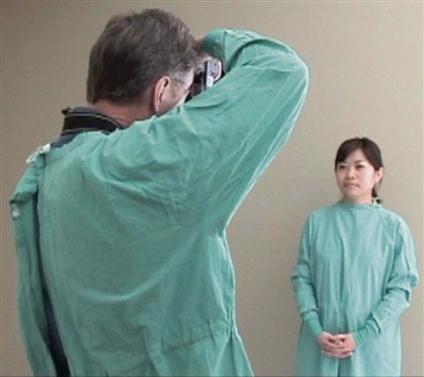
3 The area you are photographing should not be completely dry.
4 Position retractors symmetrically, and then pull out and away from the mouth.
5 If you are using a mouth mirror or a reflection mirror, you can control fogging by dipping the mirror into hot water, or use a stream of air from the air-water syringe to keep the mirror clean.
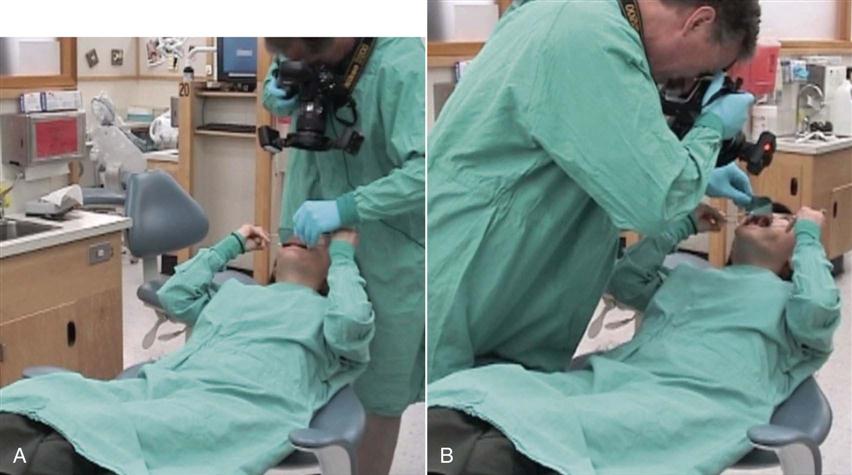
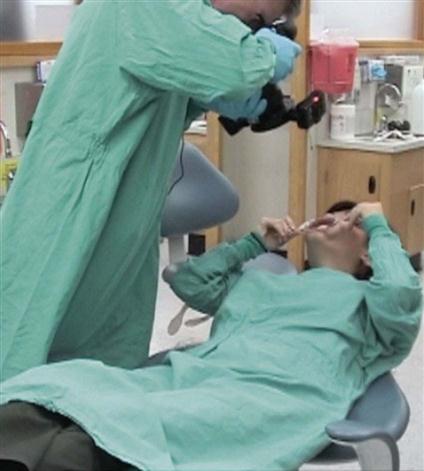
Taking Photographs
1 Think about your object. Remember to keep in mind what you are looking at: positioning, lighting, color, magnification, perspective, contrast, and background.
3 Keep fingertips, mirror edges, and retractors out of the picture as much as possible.
5 When using a mirror, try to photograph the mirror image only. Having both the direct and mirror image appear in the same photograph can be confusing.
Note: To avoid shadows, when using a flash in combination with a mouth mirror, keep the flash on the mirror side.
Recording the Dental Examination
The recording of the dental examination is often referred to as “shorthand,” which is used to describe the dentist’s findings. Charting symbols, abbreviations, and color coding can be used in the recording process to indicate various conditions and existing restorations.
To accurately and quickly chart the information dictated by the dentist, the dental assistant must learn the dentist’s preferred system for each of the areas described in this section.
Black’s Classification of Cavities
Before you can master charting methods, you must understand the process of how a dentist decides the appropriate type of restoration needed from one tooth to many teeth. When a dentist detects any deviation from normal, the decision is made to follow through with the best treatment for that area.
Dentists restore teeth according to a method developed by G.V. Black in the early 1900s. This standard classification system is universal to all dentists and is used to describe the location of decay and the best method for restoring a tooth. Black’s original classification’s included Class I through Class V. Class VI was added at a later date. Table 28-1 provides Black’s classifications, the surfaces involved, and a diagram of the cavity classification.
TABLE 28-1
Black’s Classification of Cavities
< ?comst?>
| Classification | Location and Description |
Class I
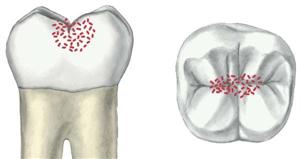 |
Decay is diagnosed in the pits and fissures of the occlusal surfaces of molars and premolars, the buccal or lingual pits of molars, and the lingual pits of maxillary incisors. Amalgam or composite resins are the restorative material of choice. Selection will depend primarily on where the lesion is and what type of strength is required for the material. |
Class II
 |
Decay is diagnosed on the proximal (mesial or distal) surfaces of premolars and molars. Because this surface area is difficult to detect visually, a radiograph is also used to locate decay. The design of the preparation/restoration will include the occlusal surface and involve proximal surfaces. The type of dental material used to restore this classification is silver amalgam (chosen for its strength) or newer composite (tooth-colored) resins designed for posterior teeth (chosen for esthetic appeal). If the tooth has extensive decay, the dentist may choose to restore the tooth with a gold or porcelain inlay, onlay, or crown. |
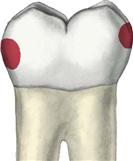
Class III
 |
Decay is diagnosed on the proximal (mesial or distal) surfaces of incisors and canines. This decay is similar to class II, except that it involves the anterior teeth. It is easier for the dentist to access these surfaces with less tooth structure affected. The type of dental material used to restore this classification consists of composite (tooth-colored) resins (for esthetic appearance). |
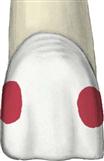
| Class IV |
Stay updated, free dental videos. Join our Telegram channel
VIDEdental - Online dental courses


