Principles and Techniques of Instrument Processing and Sterilization
Learning Outcomes
On completion of this chapter, the student will be able to achieve the following objectives:
• Pronounce, define, and spell the Key Terms.
• Discuss the seven steps involved in processing dental instruments.
• Describe the precautions that are necessary when one is packaging materials for sterilization.
• Describe the steps involved in cleaning and sterilizing the high-speed dental handpiece.
• Explain the differences between process indicators and process integrators.
• Describe when and how biologic monitoring is done.
• Explain the primary disadvantage of flash sterilization.
• Describe the three forms of sterilization monitoring.
• Explain how sterilization failures can occur.
• Explain the limitations of chemical liquid sterilants.
• Describe the classification of instruments used to determine the type of processing.
• Explain the purpose of a holding solution.
• Describe the safety precautions that are necessary when one is operating an ultrasonic cleaner.
• Describe the CDC guidelines for cleaning and decontaminating instruments.
• Describe the CDC guidelines for preparing and packaging instruments for sterilization.
Performance Outcomes
On completion of this chapter, the student will be able to meet competency standards for the following skills:
• Operate the ultrasonic cleaner.
• Perform biologic monitoring.
• Sterilize instruments with chemical vapor.
• Sterilize instruments with dry heat.
Electronic Resources
 Additional information related to content in Chapter 21 can be found on the companion Evolve Web site.
 and the Multimedia Procedures DVD
Key Terms
Autoclave (AW-toe-klayv) Instrument for sterilization by means of moist heat under pressure.
Biologic indicators Vials or strips, also known as spore tests, that contain harmless bacterial spores; used to determine whether sterilization has occurred.
Biologic monitoring Verifies sterilization by confirming that all spore-forming microorganisms have been destroyed.
Chemical vapor sterilization (ster-i-li-ZAY-shun) Sterilization by means of hot formaldehyde vapors under pressure.
Clean area Place where sterilized instruments, fresh disposable supplies, and prepared trays are stored.
Contaminated area Place where contaminated items are brought for precleaning.
Critical instrument Item used to penetrate soft tissue or bone.
Dry heat sterilizer Instrument for sterilization by means of heated air.
Endospore A resistant, dormant structure formed inside of some bacteria that can withstand adverse conditions.
Event-related packaging Instruments in packages should remain sterile indefinitely unless an event causes them to become contaminated (e.g., torn or wet packaging).
Multi-parameter indicators Strips placed in packages that change color when exposed to a combination of heat, temperature, and time. Also known as process integrators.
Noncritical instrument Item that comes in contact with intact skin only.
Process indicators Tapes, strips, or tabs with heat-sensitive chemicals that change color when exposed to a certain temperature.
Process integrators Strips placed in packages that change color when exposed to a combination of heat, temperature, and time.
Semicritical instrument Item that comes in contact with oral tissues but does not penetrate soft tissue or bone.
Single-parameter indicators Tapes, strips, or tabs with heat-sensitive chemicals that change color when exposed to a particular temperature. Also known as process indicators.
Ultrasonic cleaner Instrument that loosens and removes debris by sound waves traveling through a liquid.
Use-life Period of time during which a germicidal solution is effective after it has been prepared for use.
One of the most important responsibilities of the dental assistant is to process contaminated instruments and other patient care items for reuse.
Instrument processing involves much more than sterilization. Proper processing of contaminated dental instruments is actually a seven-step process (Table 21-1). Although the seven steps are not difficult to learn, it is very important for you to have a clear understanding of how and why each step is performed.
TABLE 21-1
Seven Steps for Instrument Processing
| Step | Technique |
| 1. Transport | Transport contaminated instruments to the processing area in a manner that minimizes the risk of exposure to persons and the environment. Use appropriate PPE and a rigid, leakproof container. |
| 2. Cleaning | Clean instruments with a hands-free, mechanical process such as use of an ultrasonic cleaner or instrument washer. If instruments cannot be cleaned immediately, use a holding solution. |
| 3. Packaging | In the clean area, wrap/package instruments in appropriate materials. Place a chemical indicator inside the package next to the instruments. If an indicator is not visible on the outside of the package, place an external process indicator on the package. |
| 4. Sterilization | Load the sterilizer according to the manufacturer’s instructions. Label packages. Do not overload the sterilizer. Place packages on their edges in single layers or on racks to increase circulation of the sterilizing agent around the instruments. Operate the sterilizer according to the manufacturer’s instructions. Allow packages to cool before removing them from the sterilizer. Allow packages to cool before handling. |
| 5. Storage | Store instruments in a clean, dry environment in a manner that maintains the integrity of the package. Rotate packages so that those with the oldest sterilization dates will be used first. |
| 6. Delivery | Deliver packages to point of use in a manner that maintains sterility of the instruments until they are used. Inspect each package for damage. Open package aseptically. |
| 7. Quality | An effective quality assurance program should incorporate training, record keeping, maintenance, and the use of biologic indicators. |
Note: Throughout this chapter, Centers for Disease Control and Prevention (CDC) recommendations are indicated, and the category of scientific evidence is noted at the end of each recommendation.
Classification of Patient Care Items
Patient care items are categorized into three classifications: critical, semicritical, and noncritical. These categories are based on the potential risk for infection associated with their intended use. The classifications are used to determine the minimum type of posttreatment processing that is required (Table 21-2).
TABLE 21-2
CDC Classification of Instruments and Procedures
< ?comst?>
| Category | Functions and Examples | Intraoral Use | Risk of Disease Transmission | Procedure |
| Critical | Function: Touch bone or penetrate soft tissue | Yes | Very high | Sterilization |
| Examples: Surgical and other instruments used to penetrate soft tissue or bone, including forceps, scalpels, bone chisels, scalers, and burs | ||||
| Semicritical | Function: Touch mucous membranes but will not touch bone or penetrate soft tissue | Yes | Moderate | Sterilization or high-level disinfection |
| Examples: Mouth mirrors and amalgam condensers | ||||
| Noncritical | Function: Contact only with intact skin Examples: External dental x-ray head |
No | Very low or none | Intermediate- to low-level disinfection or basic cleaning |
< ?comen?>< ?comst1?>

< ?comst1?>
< ?comen1?>
Critical Instruments
Critical instruments are items that are used to penetrate soft tissue or bone. They have the greatest risk of transmitting infection and are to be sterilized by heat. Examples of critical instruments include forceps, scalpels, bone chisels, scalers, and burs.
Semicritical Instruments
Semicritical instruments touch mucous membranes or nonintact skin and have a lower risk of transmission. Most semicritical items in dentistry are heat tolerant, and they should be sterilized. If the item will be damaged by heat, it should receive minimum high-level disinfection (see Chapter 20).
Examples of semicritical items include plastic-handled brushes, high-volume evacuator (HVE) tips, rubber dam forceps, x-ray film holders, and amalgam carriers.
In dental offices today, most items that are used intraorally are capable of withstanding the heat of sterilization. A fundamental rule of infection control states, “If an item can be heat-sterilized, it should be heat-sterilized.”
Rankings of Evidence
Each recommendation made by the CDC is categorized on the basis of existing scientific data, theoretical rationale, and applicability. Rankings are based on the following categories:
| Category IA | Strongly recommended for implementation and strongly supported by well-designed experimental, clinical, or epidemiologic studies (studies of patterns and causes of diseases) |
| Category IB | Strongly recommended for implementation and supported by experimental, clinical, or epidemiologic studies and a strong theoretical rationale |
| Category IC | Required for implementation, as mandated by federal or state regulation or standard |
| Category II | Suggested for implementation and supported by suggestive clinical or epidemiologic studies or a theoretical rationale |
| Unresolved Issue | No recommendation. Practices for which insufficient evidence or no consensus regarding efficacy exists |
Noncritical Instruments
Noncritical instruments pose the least risk of transmission of infection because they contact only intact skin, which is an effective barrier to microorganisms. These items should be cleaned and processed with an Environmental Protection Agency (EPA)-registered intermediate-level or low-level disinfectant after each patient use.
Noncritical clinical devices include the position indicator device (PID) of the x-ray unit tube head, the lead apron, and the curing light that comes into contact only with intact skin.
CDC Guidelines for Sterilization and Disinfection of Patient Care Items 
General Recommendations
Personal Protective Equipment
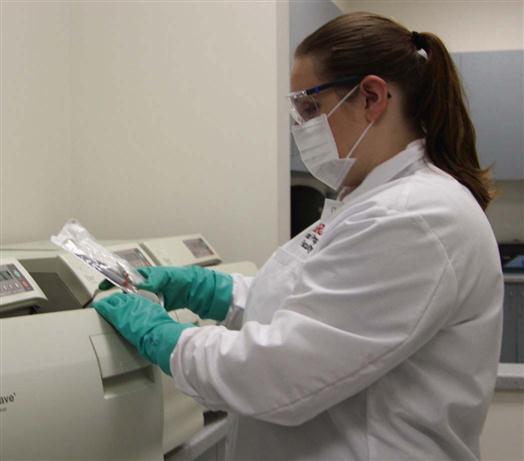
To prevent disease agents from a previous patient from being transferred to you, another dental team member, or the next patient, instrument processing must be performed in a consistent and disciplined manner. You must always use personal protective equipment (PPE), including utility gloves, mask, eyewear, and protective clothing, when processing instruments (Fig. 21-1).

Transporting and Processing Contaminated Patient Care Items
The dental assistant can be exposed to microorganisms through contact with contaminated instruments or other patient care items. Exposure can occur through percutaneous injury (i.e., needle sticks or cuts) or by contact with the mucous membranes of the eyes, nose, or mouth.
CDC Guidelines for Receiving, Cleaning, and Decontamination Procedures 
Instrument-Processing Area
The instrument-processing area, or sterilization area, should be centrally located in the office to allow easy access from all patient care areas. This minimizes the need to carry contaminated items through clean areas of the office, where sterilized instruments, fresh disposable supplies, and prepared trays are stored.
The “ideal” instrument-processing area (1) should be dedicated only to instrument processing, (2) should be physically separated from the operatories and the dental laboratory, and (3) should not be a part of a common walkway. The area should not have a door or windows that open to the outside, because dust can enter the area.
CDC Guidelines for Instrument-Processing Area 
The processing area should have good air circulation to control the heat generated by the sterilizers. The size of the area should accommodate all equipment and supplies necessary for instrument processing, with multiple outlets and proper lighting, water, and an air line and a vacuum line for flushing high-speed handpieces.
A deep sink should provide hands-free controls for instrument rinsing and (if space permits) a foot-operated or other hands-free trash receptacle. The flooring should be an uncarpeted, seamless, hard surface. The size, shape, and accessories of the instrument-processing area vary among dental offices.
Workflow Pattern
Regardless of the size or shape of the instrument-processing area, four basic rules govern the pattern of workflow. Processing of instruments should proceed in a single loop, from dirty, to clean, to sterile, to storage, without ever “doubling back” (Fig. 21-2).

If the instrument-processing area is small, you can use signs that read, “Contaminated items only,” “Precleaning area,” “Cleaned items only,” “Sterile items only,” or “Sterilization area,” to separate contaminated and clean areas. This method works well to prevent mixing of contaminated and sterile items in a small sterilization area.
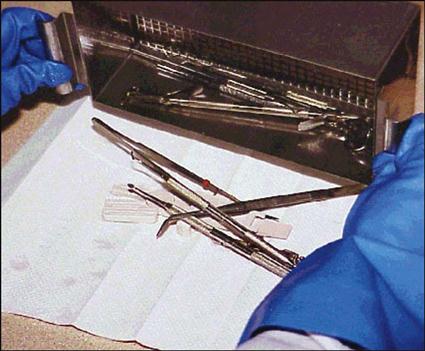
Contaminated Area
All soiled instruments are brought into the contaminated area—the initial receiving area, where they are held for processing. Any disposable items not already discarded in the treatment room are removed from the instrument tray and disposed of as contaminated waste.
Thorough cleaning should be done before all disinfection and sterilization processes. This should involve removal of all debris and organic materials (e.g., blood, saliva). Methods of cleaning are described later in this chapter.
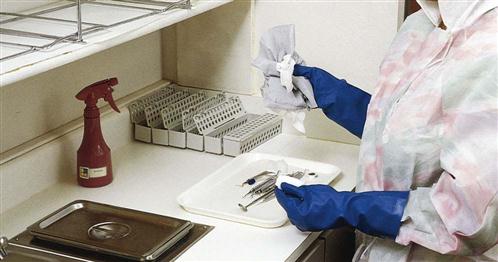
The contaminated area contains clean protective eyewear and utility gloves, counter space, a sink, a waste disposal container, holding solution, an ultrasonic cleaner, an eyewash station, and supplies for wrapping instruments before sterilization (Fig. 21-3).
Note: Soiled and clean instruments are never stored in the same cabinet.
Preparation and Packaging Area
In the preparation and packaging area, cleaned instruments and other dental supplies should be inspected, assembled into sets or trays, and wrapped or placed in packages for sterilization (Fig. 21-4).
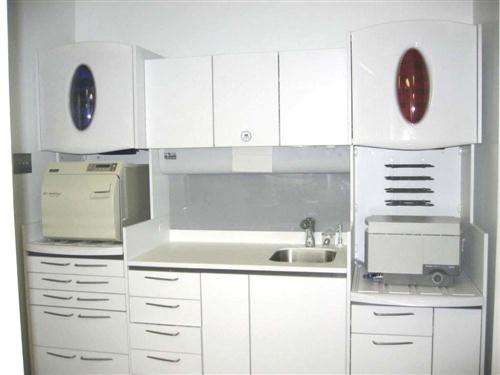
The preparation and packaging area should consist of counter space and storage space for sterilized instruments, fresh disposable supplies, and prepared trays or instrument cassettes.
Clean instruments are not sterile and could harbor pathogens. Instruments must be packaged and sterilized before they are used on a patient.
Precleaning and Packaging Instruments
Instruments may be precleaned in one of three ways: hand scrubbing, ultrasonic cleaning, or instrument washing machines.
Holding Solution
If instruments cannot be cleaned immediately after a procedure is performed, they should be placed in a holding solution to prevent the drying of blood and debris on the instruments.
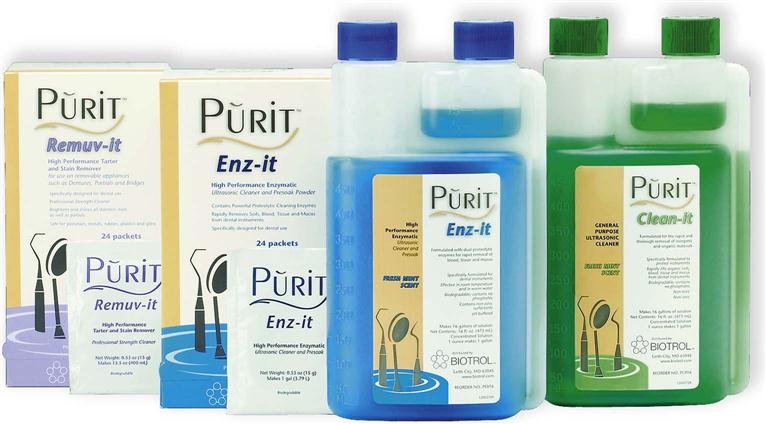
The holding solution may be any noncorrosive liquid. A commercial enzymatic solution that partially dissolves organic debris may be used (Fig. 21-5). Dishwasher detergent also makes a good holding solution because it is a low-cost, low-foaming, and readily available product. It is neither cost-effective nor desirable to use a disinfectant alone as a holding solution.
The container must have a lid and be labeled with both a biohazard label (because of the contaminated instruments) and a chemical label (because of the cleaner/detergent). The holding solution should be changed at least twice daily, and more frequently if it becomes clouded.
Remember, a holding solution is necessary only when contaminated instruments cannot be processed immediately.
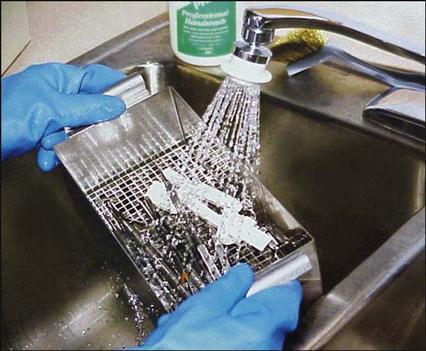
Hand Scrubbing
Hand scrubbing is the least desirable method of cleaning instruments because it requires direct hand contact with the contaminated instrument. If you absolutely must hand-scrub instruments, follow these precautions:
• Wear goggle-type eyewear and puncture-resistant gloves, as well as your protective clothing.
• Clean only one or two instruments at a time.
• Use only a long-handled brush, preferably one with a hand guard or a wide surface.
Note: Some states have specific infection control guidelines or state Occupational Safety and Health Administration (OSHA) plans that prohibit hand scrubbing of instruments. In these states, you must use an ultrasonic cleaner or machine cleaning.
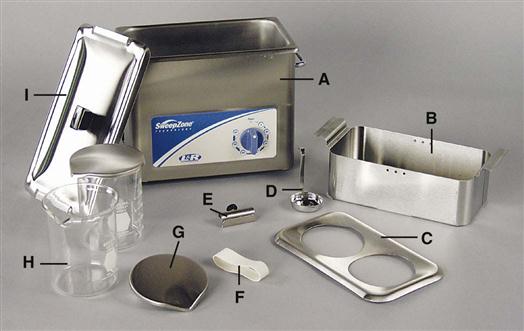
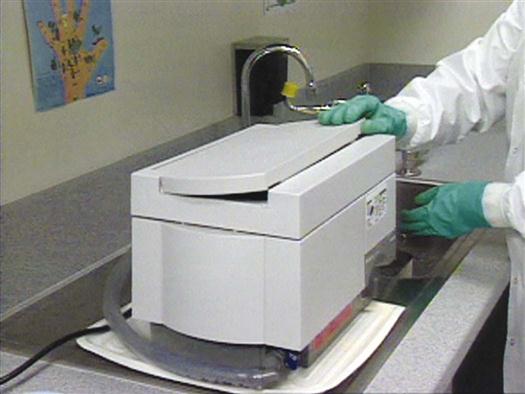
Ultrasonic Cleaning
Ultrasonic cleaners are used to loosen and remove debris from instruments. These cleaners also reduce the risk of hand injury from cuts and punctures that occur during the cleaning process (Fig. 21-6 and Procedure 21-1).
PROCEDURE 21-1 


Operating the Ultrasonic Cleaner
Goal
To prepare and use effectively the ultrasonic cleaner.
Equipment and Supplies
Procedural Steps
1 Put on protective clothing, mask, eyewear, and utility gloves.
Purpose: You will be handling sharp, contaminated instruments and using a chemical ultrasonic solution that could splash in your eyes.
2 Remove the lid from the container.
Purpose: The lid should remain on the ultrasonic device when not in use to prevent evaporation of the solution and to minimize airborne contamination.
3 Be certain the container has been filled with solution to the level recommended by the manufacturer.
Purpose: The instruments that are being cleaned must be completely submerged in the solution.
4 Place loose instruments in the basket, or, if using cassettes, place the cassette in the basket.
5 Replace the lid, and turn the cycle to “On.” The time of the cycle may vary depending on the efficiency of the ultrasonic unit. The time ranges from 5 to 15 minutes.
Purpose: Instruments in resin or plastic cassettes require longer cleaning times because resin and plastic absorb some of the ultrasonic energy.
Puncture-resistant utility gloves, a mask, protective eyewear, and a protective gown should always be worn when the ultrasonic cleaner is used. To further limit contact with contaminated instruments, keep a set of tongs near the ultrasonic unit; these can be used to remove instruments after the cleaning cycle has been completed (Fig. 21-7).
The ultrasonic cleaner works by producing sound waves beyond the range of human hearing. These sound waves, which can travel through metal and glass containers, cause cavitation (formation of bubbles in liquid). The bubbles, which are too small to be seen, burst by implosion (bursting inward—the opposite of an explosion). The mechanical cleaning action of the bursting bubbles combined with the chemical action of the ultrasonic solution removes the debris from the instruments.
Instruments should be processed in the ultrasonic cleaner until they are visibly clean. The time may vary from 5 to 15 minutes, depending on the amount and type of material on the instruments and the efficiency of the ultrasonic unit. Instruments in plastic or resin cassettes require slightly longer cleaning time because the cassette material absorbs some of the ultrasonic energy.
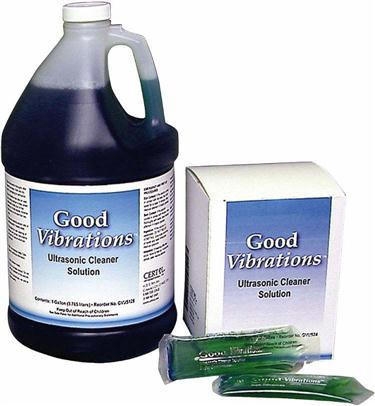
Ultrasonic Cleaning Solutions
You should use ultrasonic solutions that are specially formulated for use in the ultrasonic cleaner only (Fig. 21-8). Some ultrasonic cleaning products have enzyme activity (Fig. 21-9). Other ultrasonic cleaning products have antimicrobial activity, which reduces the buildup of microbes in solutions with repeated use. The antimicrobial activity does not disinfect the instruments; it merely prevents microorganisms from increasing in number.
Stay updated, free dental videos. Join our Telegram channel
VIDEdental - Online dental courses


