Clinical Dentistry
Learning Objectives
1 Pronounce, define, and spell the Key Terms.
2 Describe the design of the clinical area of the dental office.
3 Identify the dental equipment located in the clinical area of the dental office.
4 Demonstrate the appropriate way of admitting and seating a patient.
5 Explain the clock concept of operating zones.
6 Demonstrate the transfer of instruments for the dentist and the clinical assistant.
Key Terms
Carpal Tunnel Syndrome
Dental Operatory
Ergonomics
Grasp
Operating Zones
Subsupine
Supine
Smooth and efficient interaction between the dentist and the clinical dental assistant can determine the success of a dental practice. These two professions work closely together to accomplish four goals:
The Clinical Area
The design of the clinical area depends on the physical size of the practice, the number of dentists associated with the practice, the number of dental assistants and dental hygienists on staff, and the number of patients seen daily.
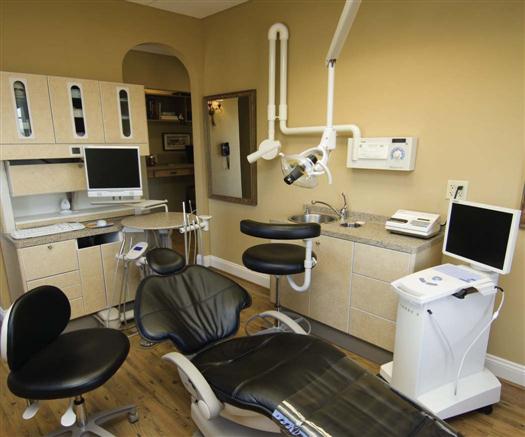
The dental treatment area, also referred to as the dental operatory, is the center of the practice (Figure 9-1). Patients receive their treatment in this designated area. It is common for most practices to have two or more treatment areas for each dentist, and then one additional treatment area for each dental hygienist.
Dental Treatment Area Equipment
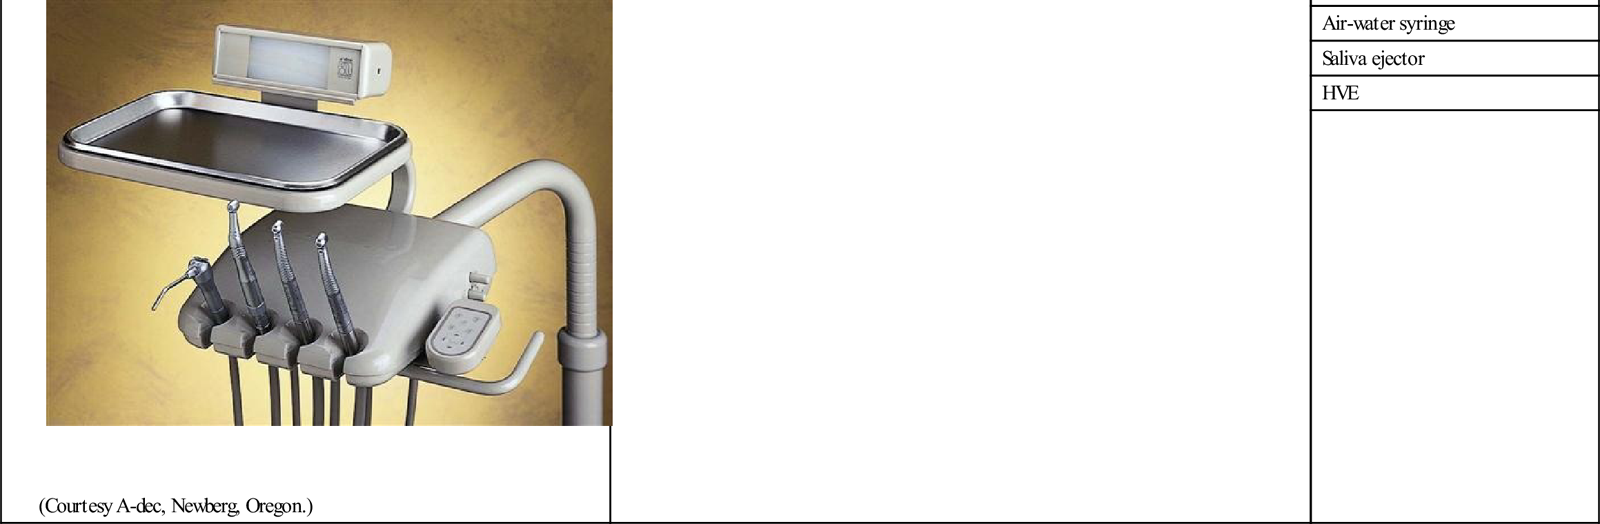
The standard dental equipment in a general dental office is provided in Table 9-1. Specific descriptions and features are provided to help you learn and be familiar with their use for each patient.
TABLE 9-1
Dental Treatment Area Equipment
< ?comst?>
| Type | Description | Features |
Dental chair
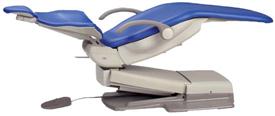 (Courtesy A-dec, Newberg, Oregon.) |
Designed to support the body, with the patient’s comfort in mind, and to position the patient correctly for patient care | Adjustable headrest |
| Support for the arms | ||
| Raise and lower chair | ||
| Swivel the chair | ||
| Adjustment controls to operate the chair | ||
Operator’s stool
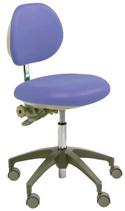 (Courtesy A-dec, Newberg, Oregon.) |
Designed to be ergonomically sound to support the body for a long period of time | Five castors for movement and balance |
| Adjustable seat | ||
| Broad base | ||
| Adjustable back | ||
Assistant’s stool
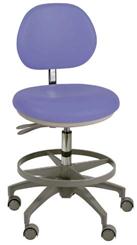 (Courtesy A-dec, Newberg, Oregon.) |
Designed to be ergonomically sound and to provide stability, mobility, and comfort | Broad base with platform base |
| Wide-base seat | ||
| Abdominal bar | ||
| Foot bar for support | ||
Operating light
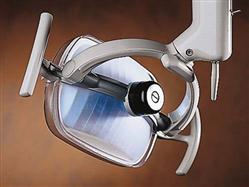 (Courtesy A-dec, Newberg, Oregon.) |
Illuminates the oral cavity | Iridescent light |
| Track mounted | ||
Air-water syringe
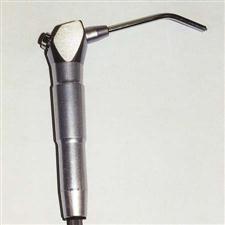 |
Used in all procedures to rinse or dry a limited area or the complete mouth; air is also used to keep the mouth mirror dry and clean | Provides a stream of water |
| Provides a stream of air | ||
| Provides a combined spray of air and water | ||
Oral evacuation system
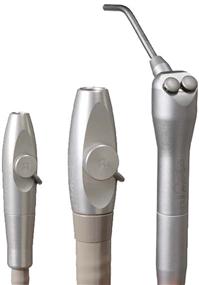 (Courtesy A-dec, Newberg, Oregon.) |
Removes excess water, saliva, blood, and debris from the patient’s mouth | Saliva ejector |
| High-velocity evacuation (HVE) (Air/water syringe) | ||
Curing light
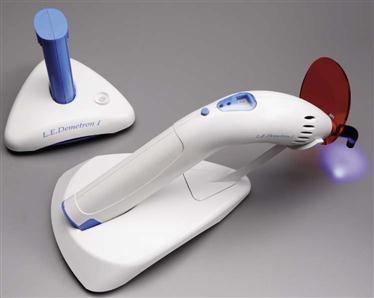 (From Boyd LRB: Dental instruments: a pocket guide, ed 4, St Louis, 2012, Saunders.) |
Electronically activated blue light that polymerize resins and composites | Lighted wand |
| Timer controlled | ||
Amalgamator
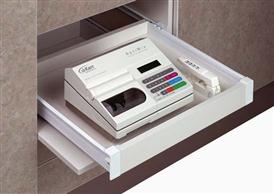 (Courtesy A-dec, Newberg, Oregon.) |
Electronically triturates encapsulated dental materials | Covered for hazardous substance management |
| Timer | ||
Rheostat
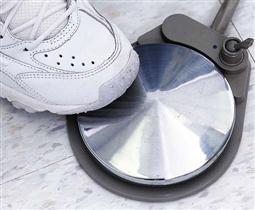 |
A device used to operate the slow- speed and high-speed handpiece | Foot controlled |
| Attached to the dental unit | ||
| Speed is controlled by foot pressure | ||
Dental unit
 (Courtesy A-dec, Newberg, Oregon.) |
Provides electrical and air-operated mechanics to the equipment | High- and low-speed handpieces |
| Air-water syringe | ||
| Saliva ejector | ||
| HVE | ||
< ?comen?>< ?comst1?>
< ?comst1?>
< ?comen1?>
Care of Dental Equipment
Dental equipment is expensive, complex, and delicate. It must always be carefully maintained in accordance with the manufacturer’s instructions. The clinical staff will take on the responsibility with the daily care of equipment throughout the dental office.
Standard Procedure Routine
No matter what type of dental procedure you are involved in, a standard procedure routine must be followed when admitting a patient, seating a patient, and positioning the dental team.
Admitting the Patient
Attention to detail when admitting a patient into the clinical area is very important in creating a positive experience for the patient. Always greet the patient by his or her last name, make sure to establish eye contact, smile, and introduce yourself if this is the patient’s first appointment.
Once you enter the treatment area, place the patient’s personal items in a safe and visible place, and initiate conversation to help the patient feel more comfortable and relaxed.
Positioning the Patient
The area of the mouth being treated and the type of procedure will determine the position of the patient chair. A patient can be placed in several different positions.
In the upright position, the back of the chair is placed at a 90 degree angle (Figure 9-2). This position is used for patient entry and dismissal. It may also be used when radiographs are exposed and when impressions are taken.
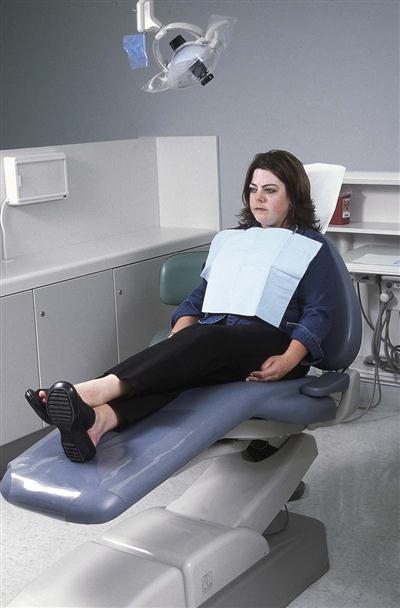
In the supine position, the chair back is lowered until the patient is almost lying down (Figure 9-3). Because of the contour of the chair, the patient will not appear flat. The patient’s head and knees should be at the same approximate plane. Most dental treatment takes place in this position.

The subsupine position is where the patient’s head is actually lower than the feet. This position is specifically recommended if a patient becomes unconscious in an emergency situation.
Positioning the Dental Team
The manner in which the dentist and the clinical assistant position themselves around the patient allows for smooth and efficient team interaction (Figure 9-4). This concept was designed for the chairside assistant to work in close proximity with the dentist.
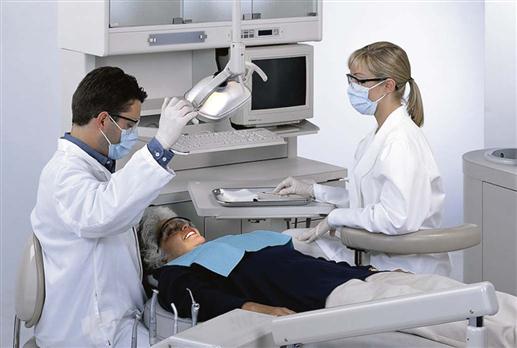
The rationale of this type of pos/>
Stay updated, free dental videos. Join our Telegram channel
VIDEdental - Online dental courses


