Chapter 4
Rhomboid flap
Introduction
Limberg initially described the rhomboid flap in the 1940s,1 and thus it is often referred to as the Limberg flap. The rhomboid flap was later modified by Lister and Gibson to encompass the classic angles of 60 and 120 degrees with equal lengths of all sides.2 Several modifications of this flap have been described; however, most have been related to the mathematical principles of the flap rather than the clinical application.3, 4 In 1987, Quaba described a clinical modification of the rhomboid flap where he maintained the circular shape of the defect and the flap was kept nearly the same shape.5 The modification allowed for an increased number of options for reconstruction of the defect rather than the conventional four flap options.
The rhomboid flap has long become one of the mainstay flaps for reconstruction of small to medium-sized head and neck defects. The benefits of this flap are many and the drawbacks few. The use of this flap revolves around the plasticity of the skin and its ability to be moved to adjacent locations without jeopardizing the blood supply to the flap or altering the appearance of the surrounding areas. This flap can be utilized to cover relatively small defects and with some modification of the base defect, one can use multiple rhomboids to cover a relatively large area. This makes the rhomboid flap indispensable for the head and neck surgeon, who needs to be able to perform the technique well.
Anatomy
The anatomy for the rhomboid flap is dependent on the area of the defect. The surgeon needs to be familiar with the local and regional anatomy of the facial region in order to be able to design the flap in what will be the most esthetically pleasing final result while at the same time not compromising or altering the local function of regional structures.
Like any other cutaneous flap, the rhomboid flap is also dependent on cutaneous perfusion. The cutaneous flap is based on the vascular anatomy of the skin, representing a continuum from small local random flaps based on the subdermal plexus to perforator flaps based on musculocutaneous or septocutaneous perforators of the deep fascia.6
Flap harvest
Single rhomboid flap
- The area to be excised is marked with the appropriate margins to render the patient disease-free from an oncologic standpoint.
- Once the marking is completed, the next step is to draw a rhomboid with the planned excision area inside this rhomboid. The internal angles formed by the sides of the rhomboid should be 60 degrees and 120 degrees (Figure 4.1).
- The next step is to determine the best area of tissue, which can be moved into the defect area without causing distortion to the surrounding area.
- The areas in the head and neck that are particularly important to consider would be areas in or around the eyebrows, the forehead hairline, the eyelids, upper and lower lips, and the nose (Figure 4.2).
- The marking is done by extending a line directly out from the 120 angle of the rhomboid to a length equal to the width of the defect.
- Next, another line is drawn from the end of the previously drawn line parallel to the side of the rhomboid and equal in length to the side of the rhomboid.
- This area will be the tissue that will be moved onto the defect site.
- The marked area is incised down to the connective tissue (Figure 4.3).
- The flap is elevated and the area is undermined in a wide area so as to allow for the transposition of the flap into the defect (Figure 4.4).
- The flap is inset by placing key anchoring sutures at the sites of maximal tension (Figure 4.5).
- Dermal sutures are placed to reapproximate the tissues and the skin is closed according to surgeon’s preference (Figure 4.6).
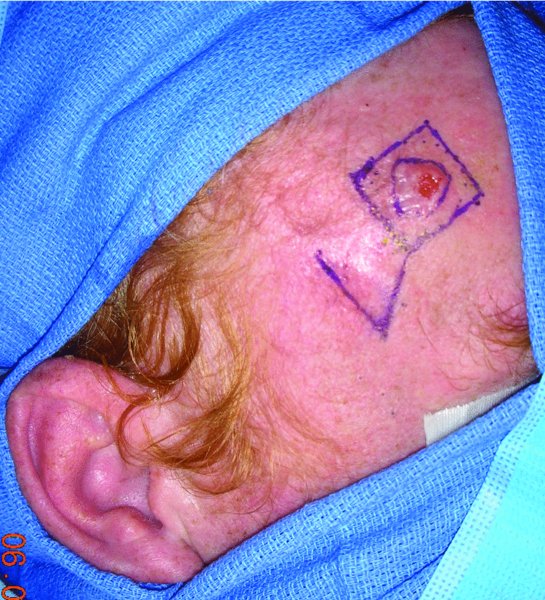
Figure 4.1 View of the planned excision of a forehead lesion with plan for a rhomboid flap.
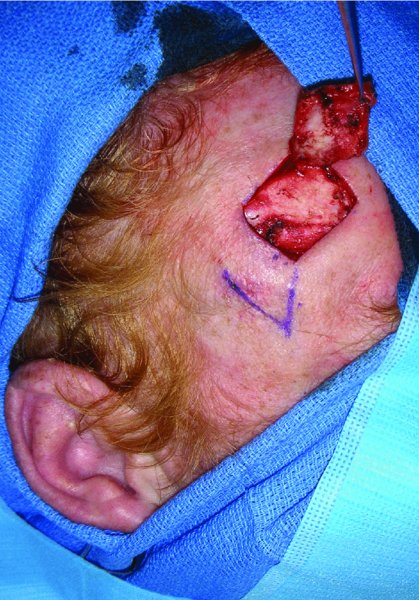
Figure 4.2 Excision of the lesion prior to flap elevation.
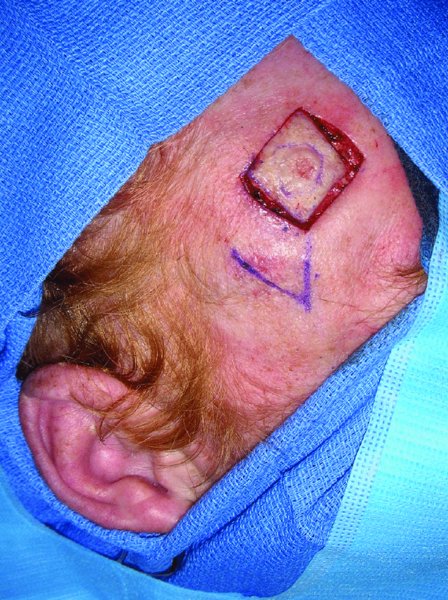
Figure 4.3 Completed excision prior to removal of the lesion.
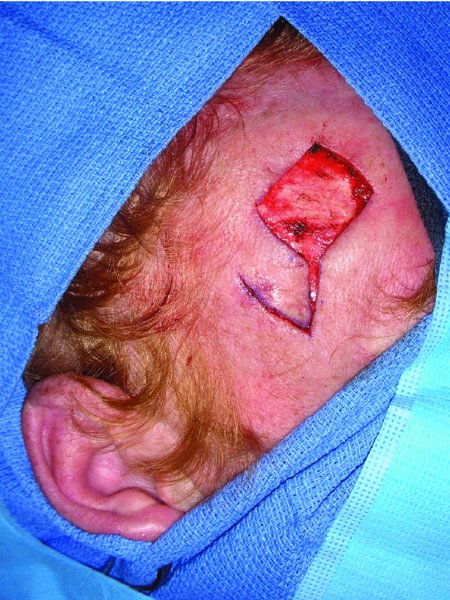
Figure 4.4 Incision of the planned rhomboid flap, note the position of the flap is done so as to minimize disruption to the position of the eyebrow and forehead.
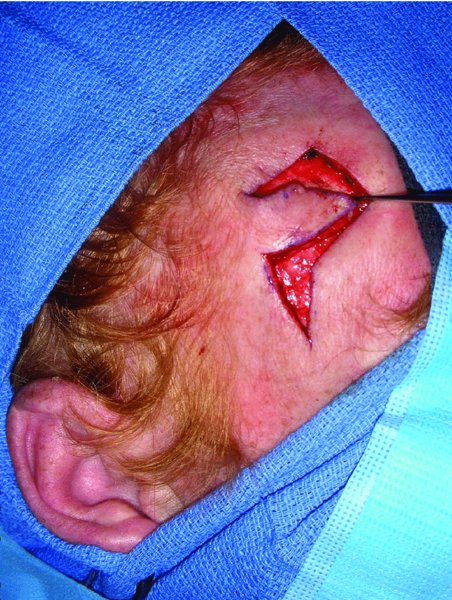
Figure 4.5 Rotation of the flap into the defect after appropriate undermining.
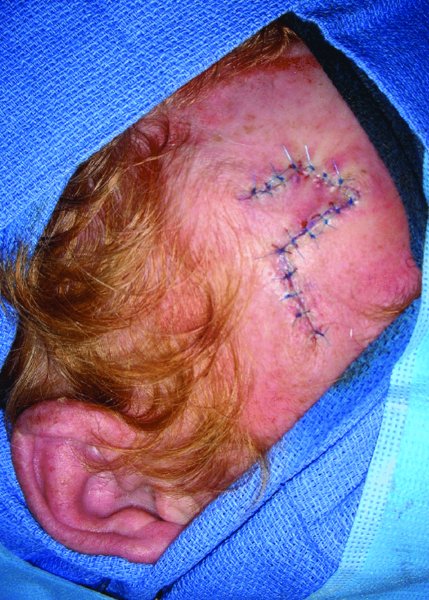
Figure 4.6 Inset of the flap into the defect.
Stay updated, free dental videos. Join our Telegram channel
VIDEdental - Online dental courses


