CHAPTER 12 Instrumentation
PURPOSE OF INSTRUMENTATION
The purpose of clinical instrumentation is to create an oral environment where periodontal health is maintained and tissues can return to health. It is accomplished by debridement (or scaling) of the teeth to remove hard deposits to discourage dental biofilm (dental plaque) attachment, such as calculus and/or stain during an oral prophylaxis or nonsurgical periodontal therapy (NSPT), as well as periodontal maintenance (PM). Manual instruments, power-driven instruments, or combination of the two can be used to effectively debride (scale) the teeth and accomplish this goal. Loupes and a headlight are BOTH useful for improving instrumentation. Use of the dental endoscope (Perioscope) creates further opportunity for successful NSPT or PM by offering a tool to aid in definitive instrumentation.
 •
• Positioning
CLINICAL STUDY
Basic Instrument Design
 , ¼,
, ¼,  .
.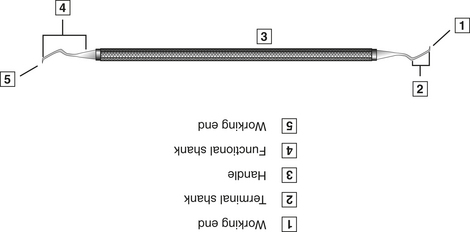
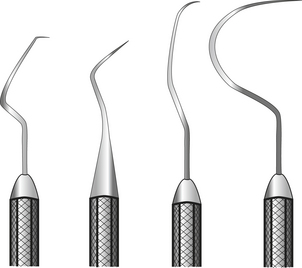
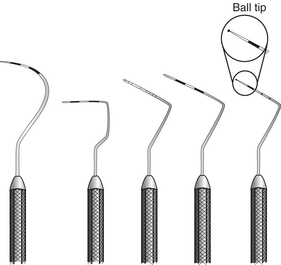
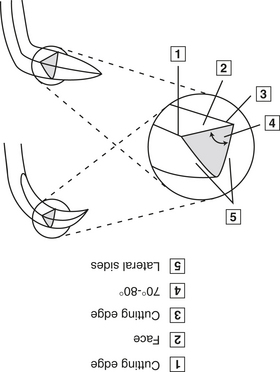
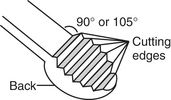
Figure 12-4 Sickle scaler working ends may be either straight or curved. All are triangular in cross section.
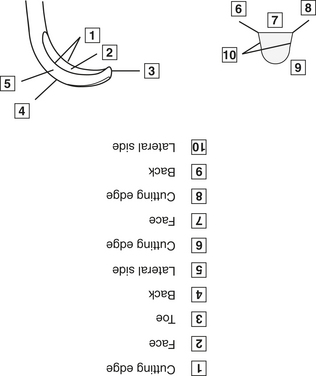
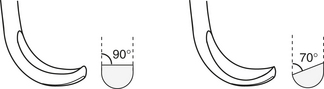
Figure 12-5 The basic design of all curets is rounded toe, rounded back, and a half-moon-shaped cross section.
| Gracey curet | Designated area of use |
|---|---|
| Gracey 1-2 and 3-4 | Anterior teeth |
| Gracey 5-6 | Anterior or premolar teeth |
| Gracey 7-8 and 9-10 | Posterior teeth buccal and lingual surfaces |
| Gracey 11-12 and 15-16 | Posterior teeth mesial surfaces |
| Gracey 13-14 and 17-18 | Posterior teeth distal surfaces |
Principles of Manual Instrument Use
Principles of manual instrument use include grasp, fulcrum, adaption, angulation, stroke.
INSTRUMENT SHARPENING
Stay updated, free dental videos. Join our Telegram channel
VIDEdental - Online dental courses


